[045] Taking photos of Jupiter
[045] Taking photos of Jupiter, text and photos by
Juza. Published on 08 Giugno 2012; 2 replies, 10239 views.
Shooting data: Canon EOS 7D, Canon 800mm f/5.6 L IS USM, Canon 1.4x TC II, 1/250 f/10, ISO 200, tripod. Morocco.
This is my second attempt at photographing Jupiter. The first time, several years ago, I used the humble Canon 350D with the 600mm f/4 and stacked teleconverters; during my recent trip in Morocco, I tried the same photo with the Canon 7D, Canon 800mm f/5.6 L IS USM and several combinations of teleconverters. By naked eye, Jupiter looks like a very bright star; in September 2010 it was in a very favorable position of its orbit, and when I have taken this photo (October 05, 2010), it was still pretty large in the sky and it was clearly brighter than the stars. I was in Morocco for a photo trip with my friend Sandro, there were not many light around and the air was cold: a very good opportunity for astrophotography.
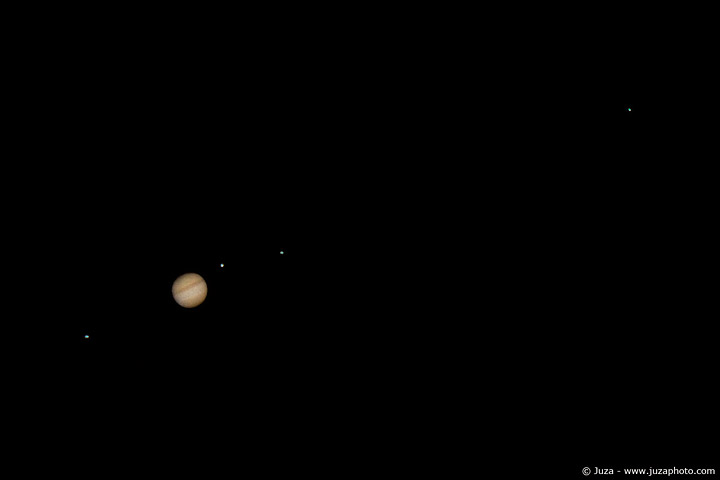
I begun with 800mm + stacked 1.4x and 2x teleconverters, to get an effective focal length 2240mm, or 3580mm if you consider even the 1.6x multiplier of the 7D. With this combination, looking in the viewfinder is breathtaking - you can see very clearly the planet and its four larger satellites Io, Europa, Ganymede and Callisto (they are called "Galilean moons" because they were discovered by Galileo using the telescope that he built). It is not easy to frame the planet, because at this extreme focal length the angle of view is minimal and it takes some time to find the subject.
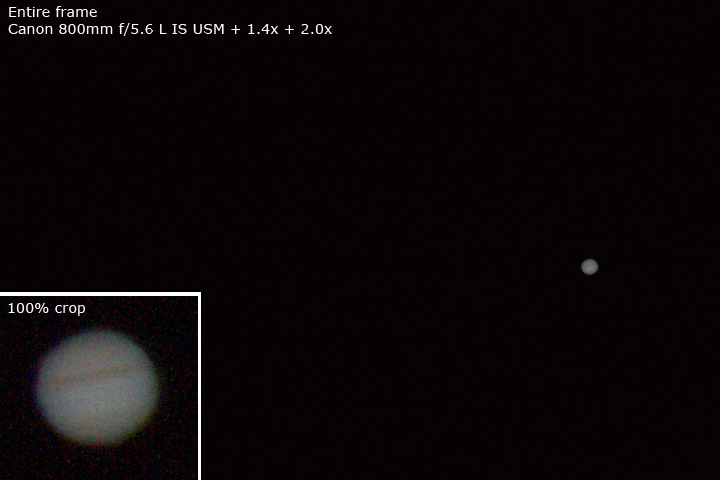
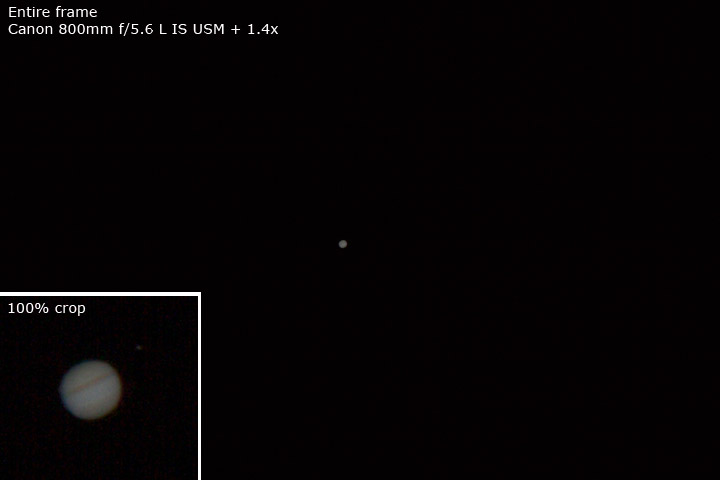
The photo above show both the entire frame and a 100% crop. The planet is relatively big, but the image is very soft due to the use of stacked teleconverters. After this photo, I tried again, this time using only the 800 + 1.4x, for an effective focal length of 1120mm. This is the result:
Even though the planet is much smaller, the photo is a lot sharper, and it has more detail. The difference becomes more clear when you compare side by side a crop from the 800 + 1.4x photo (A), a crop from the 800 + 1.4x + 2.0x photo (B), and an interpolated (enlarged) version of the 800 + 1.4x photo (C). The third crop has both more detail and less noise than the photo taken at maximum magnification, because the 800 with only 1.4x is much sharper than the stacked TC combo.
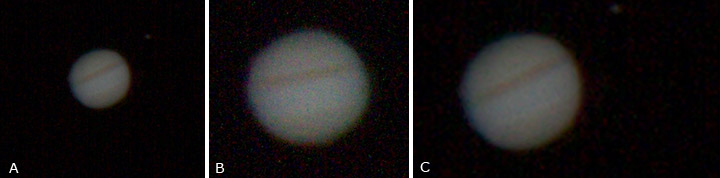
Even though it may sound weird, in this case by stacking teleconverters you actually get less magnification: you have a larger photo, but it has less detail than the photo taken with shorter focal length and magnified with software.
The brighness of the satellites is much less than Jupiter, so it is impossible to expose correctly both the satellites and the planet: the only solution is a double exposure. All the crops that you see there had been taken from the Jupiter exposure, but for the final image I had to take a second exposure (1/60 f/10, ISO 3200) where the satellites are visible, then I blended the two photos.
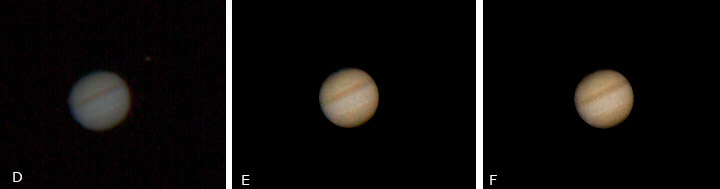
The last step after getting a good photo is post processing. "D" is a crop from the unprocessed photo; it has dull colors and some noise. In the next step (E), I have eliminated the noise from background using selections and noise reduction, I have increased the contrast and balanced the colors. The image is pretty good, but there is still some noise and some green chromatic aberration around the planet. Using layers and layer mask, I eliminated the chromatic aberration (in this case the "Remove CA" tool of PS does not work, you have to remove it using color balance and selections). Last, I applied some color noise reduction to get a slightly cleaner view.
If you have at least a 500/600mm lens (e.g. 400mm + 1.4x TC) and an APS-C body, I encourage you to try photographing Jupiter: it is pretty fascinating and funny! If you want to see truly out of this world photos of the planet, instead... enjoy it on NASA website:
solarsystem.nasa.gov/planets/profile.cfm?Object=Jupiter&Display=Gallery Replies and comments
What do you think about this article?
Do you want to tell your opinion, ask questions to the author, or simply congratulate on a particularly interesting article?
You can join the discussion by joining JuzaPhoto, it is easy and free!
There is more: by registering you can create your personal page, publish photos, receive comments, join discussions and you can use all the features of JuzaPhoto.
With more than 258000 members, there is space for everyone, from the beginner to the professional.
|
|
sent on 29 Agosto 2013 (23:33)
very interesting
|
|
|
sent on 30 Novembre 2014 (3:43)
Great info thank you for sharing !!!
|

 JuzaPhoto contains affiliate links from Amazon and Ebay and JuzaPhoto earn a commission in case of purchase through affiliate links.


