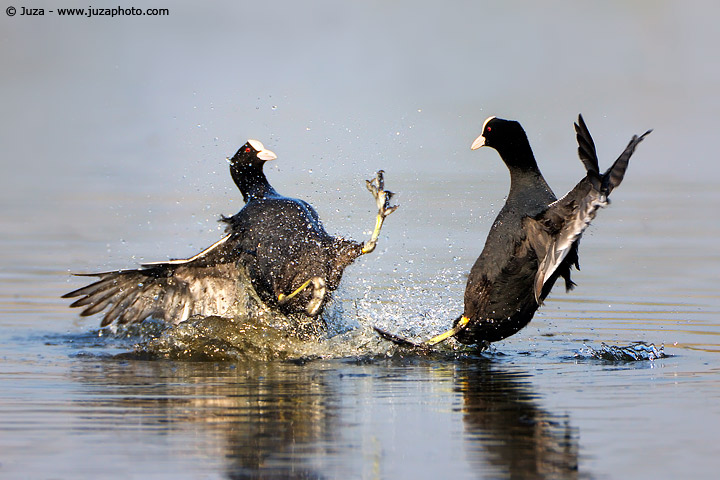
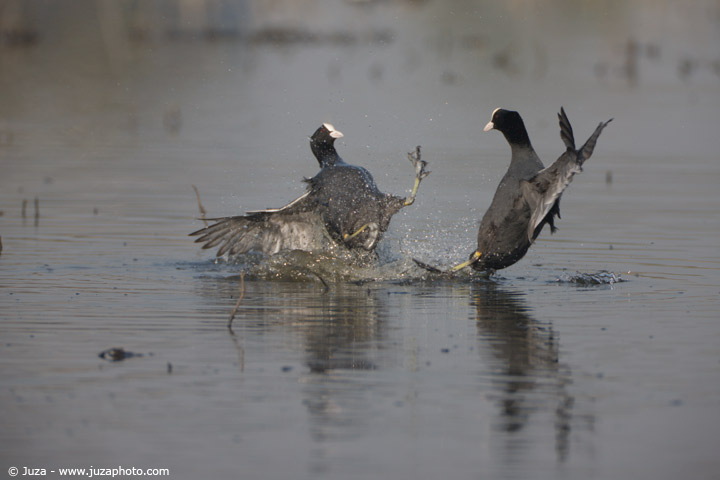
The original, unprocessed, photo. The first thing I usually do after cropping is contrast boost to bring out the colors and to give more depth to the image. In this case, I worked on two layer to enhance the overall contrast without blowing out the highlights - the white bill of the coots is though to expose properly, and even during post processing you have to pay attention. After contrast, I increased the saturation to +20. The photo looked better, but I was not satisfied, there were many small distracting elements that keep away the attention from the subject. I have eliminated the sticks using the cloning tool, while the Spot Healing has been perfect for the small back spots in the water (Spot Healing works well when you have to eliminate something from an uniform surface, while Cloning is better when you have to eliminate something from a complex surface).
At this point, I wanted to enhance as much as possible the separation from background, so I created an empty layer, I selected the PaintBrush tool with a very large diameter, hardness 0% and from 20 to 40% of opacity, and I "painted" into background with the same blue color of water. This is a very effective technique that helps a lot in many photos, but many times I have seen it badly executed! I have already described it in depth in the
[url=http://www.juzaphoto.com/eng/articles/photoshop-cloning_retouching.htm] Cloning and retouching[/url] article, but I'll repeat the fundamental principle: often you have to paint even above the subject. Once you have reached the desired result into background, you apply a "Reveal All" layer mask and you remove the unwanted color from the subject, using a small brush, 100% magnification and a lot of patience ;-)
Other than that, you must remember that this technique can improve only a background that is already quite out of focus, it can not turn an in-focus background into out of focus, and if you overdo it you will get very artificial looking results.
The last step was to make a small selective contrast adjustment for the eyes. The coots have fantastic red eyes, and I want them to stand out in the final image, so I create a second layer, where I increased a lot the contrast and the brighness - nearly all the photo become extremely overexposed, but the eyes have become bright and red. I applied the "Hide All" layer mask and with a small brush I have revealed the "enhanced" layer only on the eyes; since initially the effect was too much, I reduced the opacity of the "eyes correction" layer to 70%. Is it all? Not yet! When I reviewed the photo, I noticed it still lacked a bit of contrast, so I applied a gentle S curve; Curves allow to enhance the contrast without losing detail in the whites or in the dark areas.
Risposte e commenti
Che cosa ne pensi di questo articolo?
Vuoi dire la tua, fare domande all'autore o semplicemente fare i complimenti per un articolo che ti ha colpito particolarmente? Per partecipare iscriviti a JuzaPhoto, è semplice e gratuito!
Non solo: iscrivendoti potrai creare una tua pagina personale, pubblicare foto, ricevere commenti, partecipare alle discussioni e sfruttare tutte le funzionalità di JuzaPhoto. Con oltre 242000 iscritti, c'è spazio per tutti, dal principiante al professionista.
| inviato il 21 Aprile 2016 ore 19:17
wonderful creations..! |


 JuzaPhoto contiene link affiliati Amazon ed Ebay e riceve una commissione in caso di acquisto attraverso link affiliati.