Asiair PRO remote controlling
Asiair PRO remote controlling, testo e foto by
Afettoxiulong. Pubblicato il 21 Luglio 2022; 0 risposte, 197258 visite.
My astrophotography gear is actually set up as follow:
Mount: Skywatcher EQM35 Pro Synscan goto
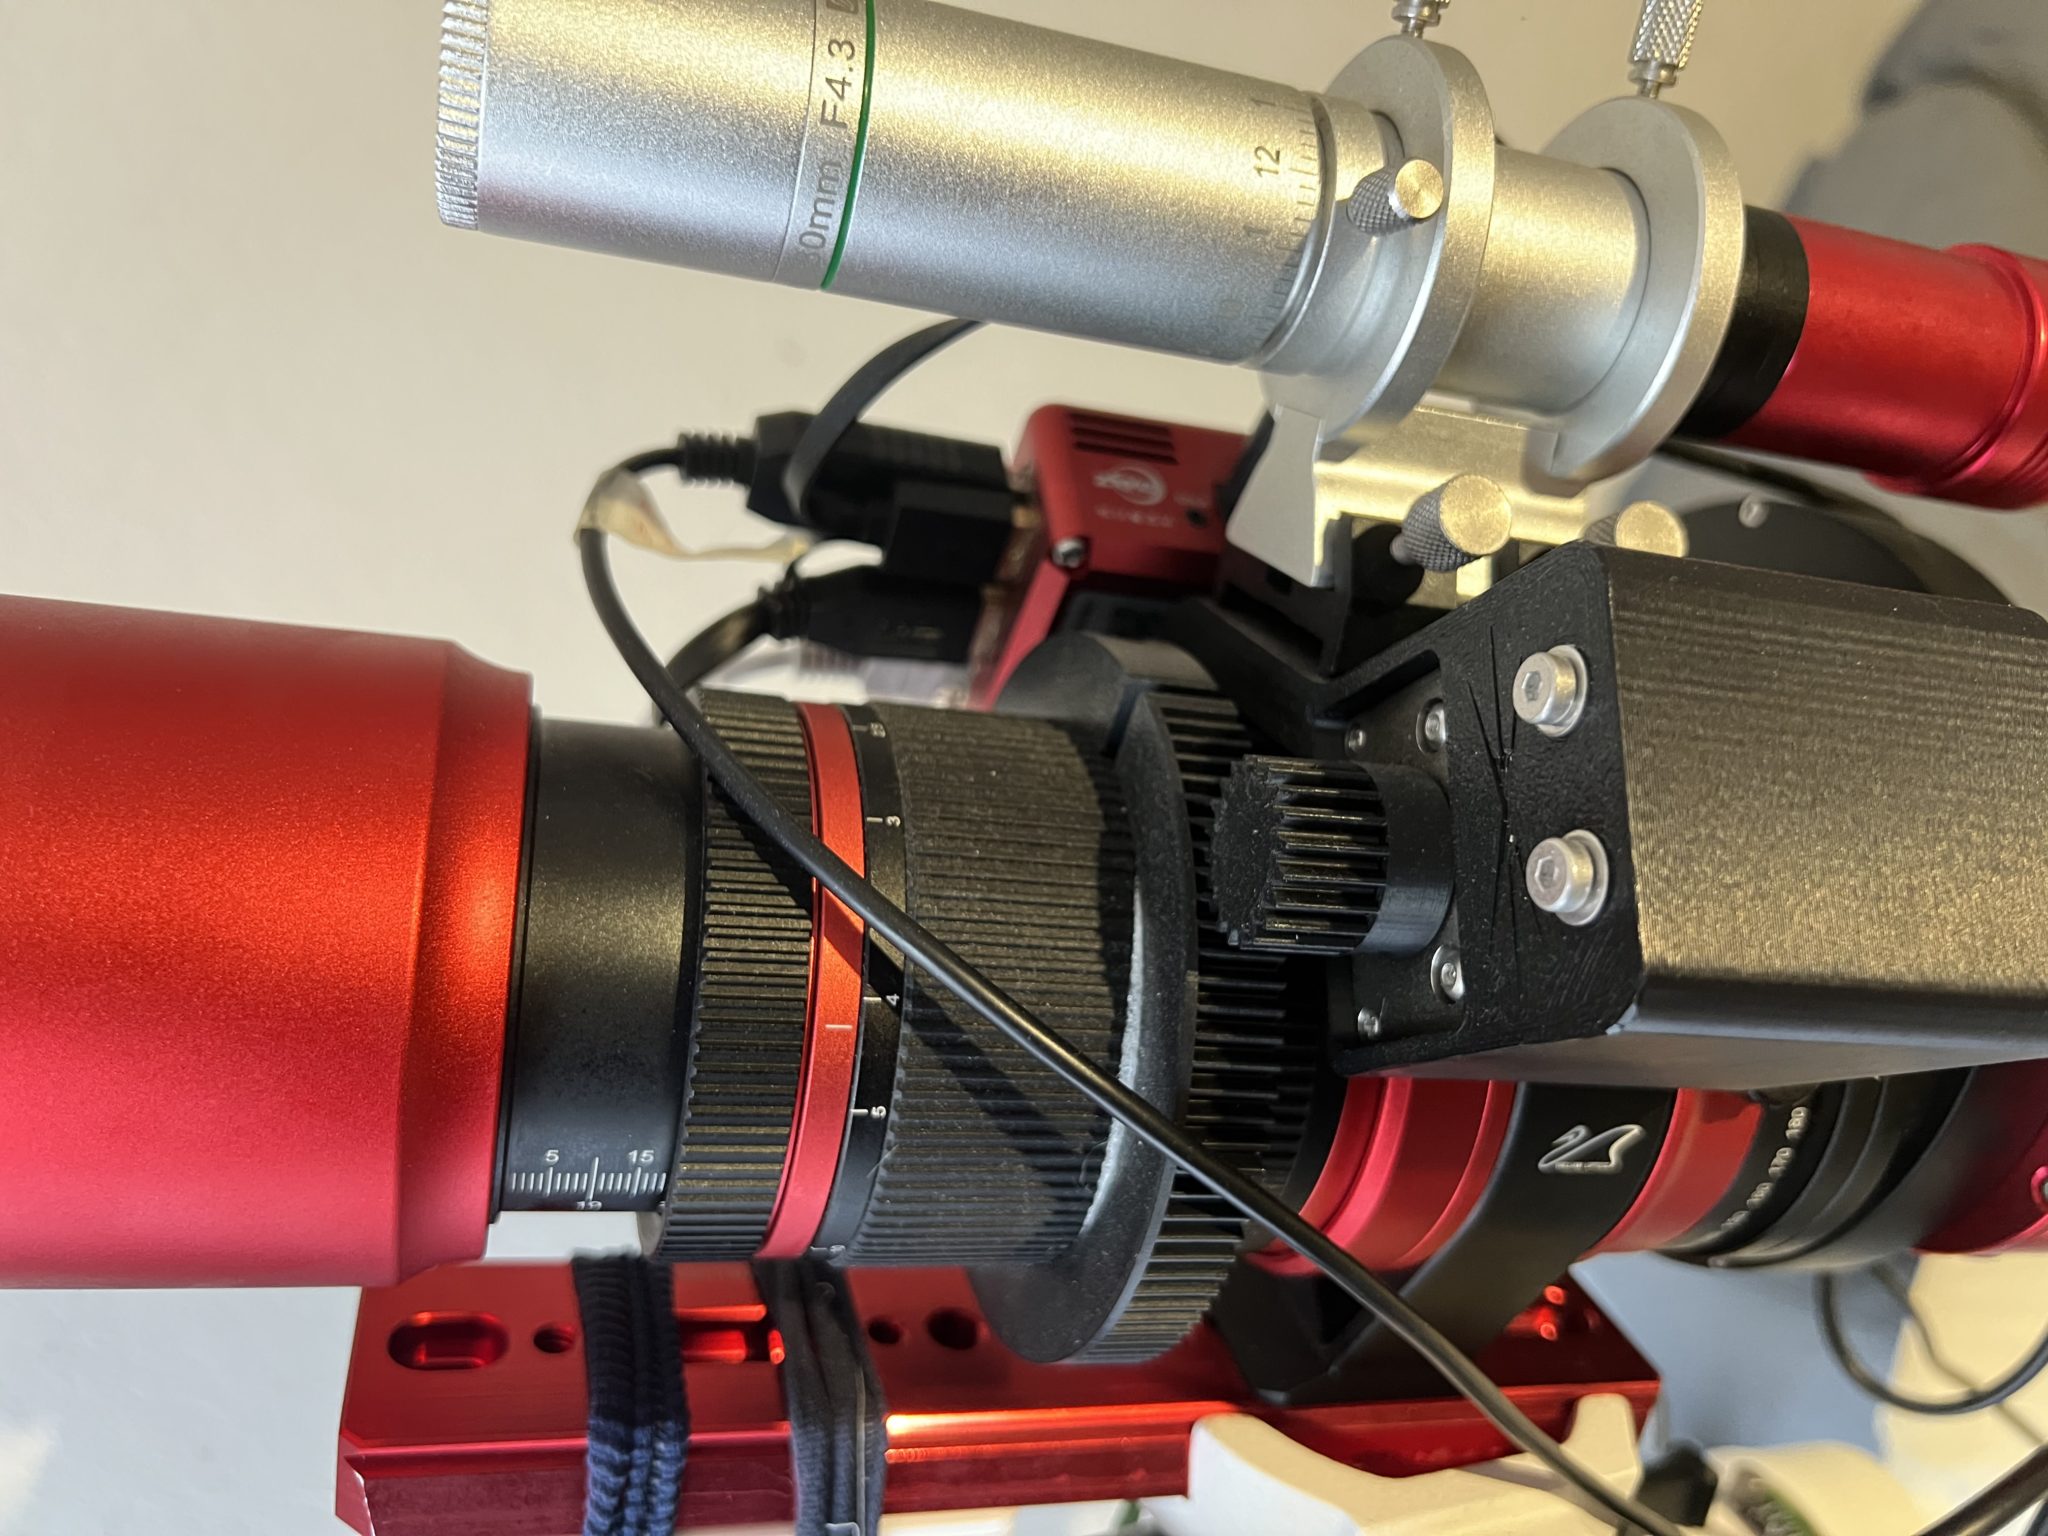
Scope: William Optics Redcat 51
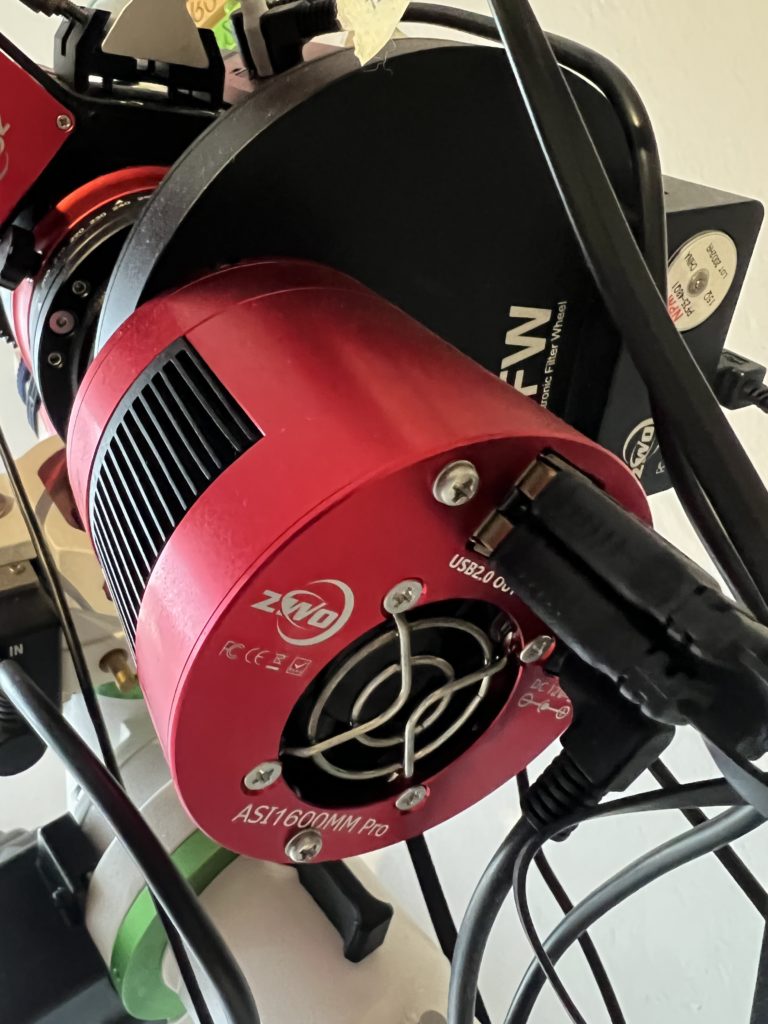
Main camera: ZWO ASI1600MM-Cool pro
Guidescope: QHY miniscope 30/130
Guide camera: ZWO ASI 120mm mini
Filter Wheel: ZWO AFW 8×1,25? (LRGBHSO by Astronomic, 8th place actually empty)
Focuser: ZWO EF with ProAstroGear Blackcat adaptator (excellent!!!)
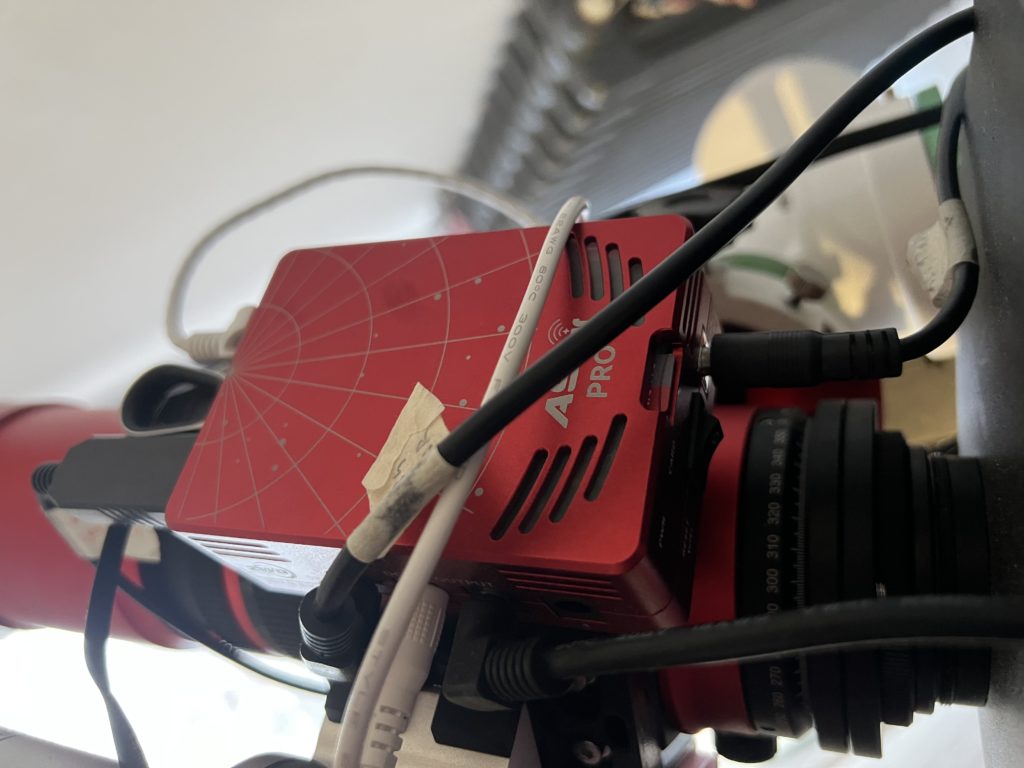
WiFi: ZWO WiFi Extender for ASIAIR Pro
Power
All astrophotography setup power is cabled to electric line by a TP-Link Tapo P100 mini Smart Wi-fi socket thus to start asiair pro and powering all astrophotography gear by remote control.
Between domestic line to Tapo Wi-Fi socket a Tecnoware UPS ERA PLUS 750 is placed to grant stability of electric line flux and proper protection against black-out.
Asiair pro provides to supply main camera, EQM35 mount and wifi-extender.
ASIAIR pro USB3 ports get ASI 1600 main camera and 128gb USB stick.
Asiair pro USB2 ports get EFW and EQM35 plug.
ASI 1600 Main camera usb hub provides to supply asi 120 mini guide and asi focuser.
Wi-Fi lines
Home observatory Whireless line is provided by my domestic Huawei B311-211 Router 4g Wireless LTE with a standard (actually Iliad) sim.
ZWO wifi extender is set-up to extend Huawei Whireless line.
Asiair Pro is set up in station mode linking at Huawei wifi line.
Remote controlling

A domestic smart-tv Windows 10 mini pc Bmax B2 (128gb/8gb) is adapted for remote operation and ASIAIR pro controlling by running :
— VNC server for remote control
— Bluestacks Android simulator with asiair pro app installed
Other solution I've red and experimented, red and not experimented.
Some of them probably could better fit to remote controlling of ASIAIR pro “grounded” or not Astrophotography gear, especially Astroberry – from which I came , stellarmate or Primaluce system.
Moreover I'm not happy at all to had switched from an open source grounded systems to windowz stuff, but I sincerely admit that imo this is the most stable, regular and trustable system I have had under my hands.
Further development I wish to implement further development as for instance
1) Remote controlled telescope dust-cover to be opened / closed on demand.
Best if provided of Flattener panel, thus to create optimized dark/flat calibration files for best performance in post-production.
Thinking about WO REDCAT 51 FLAP PANEL (FP1) by Deepskydad.com:
https://youtu.be/FctgkwcLZBw 2) A better video surveillance and anti-thief system to be developed into my domestic security system.
3) Windowz mini pc formatting for at least an Ubuntu stable version
for 1. and 2.
I probably made operative again my Raspberry pi 4b and find money and time to do.
For 3. just waiting for Easter holidays or a long weekend grinning face
Hoped I helped or going to help someone.
Please forgive my bad English and feel free to share any suggestion, idea or opinion U may want.
Wishing everybody clear skies.
***
Asiair Pro specification 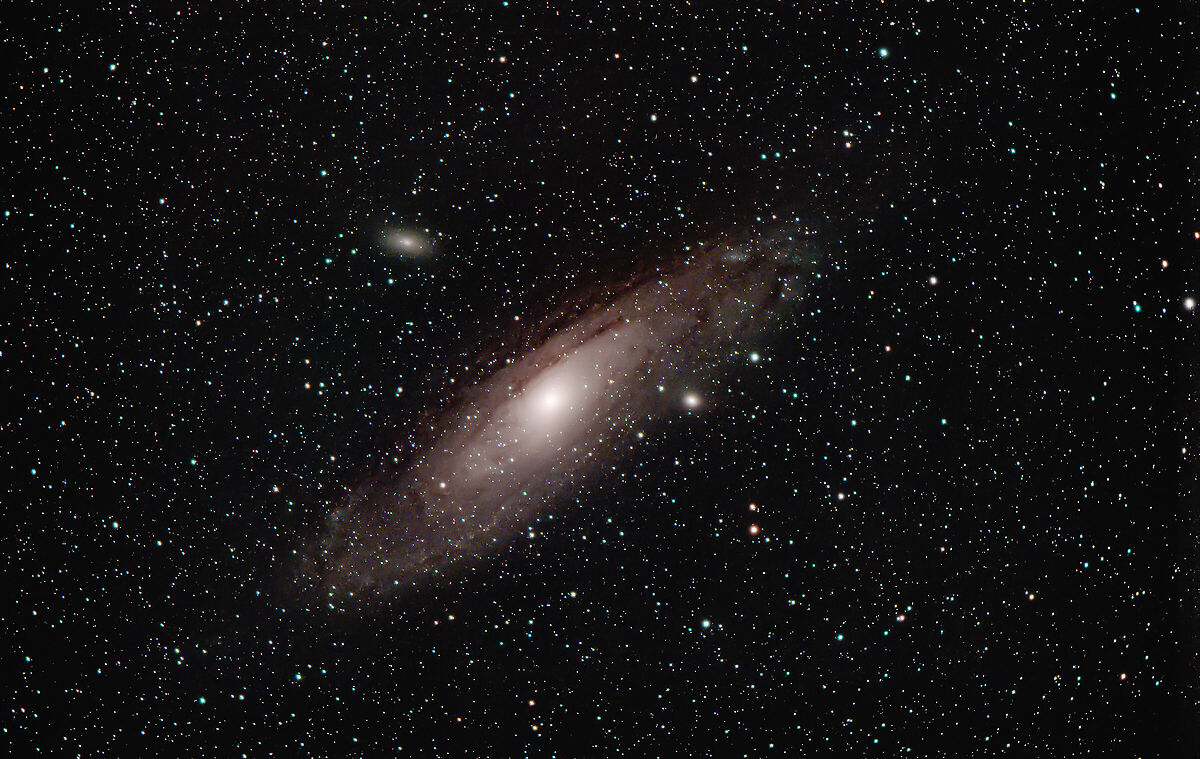
ASIAIR PRO is a smart WiFi device. It is equipped with a lightweight power management module, ample USB interfaces, and multiple dovetail mounting methods.
With the rich features of the ASIAIR App, the whole procedure from device integration to image capture runs particularly smooth.
ASIAIR PRO is the second generation of ZWO that has been continuously improved and newly designed since the first generation of ASIAIR was released in July 2018.
Superb craftsmanship with a strong tactile appeal ASIAIR PRO shell is made out of aluminum and processed by CNC tech. After the surface is anodized, it not only protects the shell well, but also has a comfortable feel. The size of the whole machine is 92 x 67 x 35 mm, making its size and weight excellent, which can be easily grasped by hand.
ASIAIR PRO is equipped with a lightweight power management module. There are four DC 5.5 x 2.1 mm power outputs on the side of the body, one DSLR shutter release port, two USB 2.0 and USB 3.0 ports each. The power supply is stable and reliable, the interface is rich and diverse, and the wiring is easy and orderly. It also comes with 84 GB of free storage, so you can capture images freely.
ASIAIR PRO is a smart WiFi device that allows you to control Mainstream DSLR cameras.
All ASI Mini series cameras(ASI120MM Mini, ASI174MM Mini and ASI290MM Mini)
ASI120MC-S/MM-S, ASI385MC, ASI224MC, ASI178, ASI174, ASI290, ASI462
ASI1600, ASI294, ASI183, ASI071, ASI533, ASI2600, ASI6200, ASI2400
It does not support ASI120MM/MC camera
***
Zwo ASI1600mm Pro (cooled)
The ASI1600MM Pro is one of the most popular cameras from ZWO. It has gained a reputation as a fantastic camera if you want to get serious about your astrophotography. Some of the highlights include:
4/3” format with 3.8 um pixel size– flexible pixel size for many types of telescopes.
12-bit ADC – giving high dynamic range of 12.5 stops.
A solid 20ke- full well capacity– helping to reduce the issue of, for example, saturated stars.
16-megapixel sensor with 4656*3520 pixels– plenty of detail can be captured in high resolution.
Read noise as low as 1.2 e-.
DDR memory buffer is the main difference between ASI “Cool” and “Pro” cameras.
ASI1600MM Pro camera includes a 256MB DDR3 memory buffer to help improve data transfer reliability. Additionally, the use of a memory buffer minimizes amp-glow, which is caused by the slow transfer speeds when the camera is used with a USB 2.0 port.
ASI1600 Pro offers very good performance for astrophotography. Low read noise, low dark current, high dynamic range.
ASI1600 has a build-in 12bit ADC but can provide 12.5 stops dynamic range which is even better than KAF8300 due to its super low read noise.
USB 3.0 Port: Provides 5Gb bandwidth to make it possible for ASI1600 Pro to run at 14.7 fps (12bit, normal mode) or 23 fps (10bit, high speed mode) at full resolution (16Mega).
USB 2.0 HUB: Can connect with various accessories, including a filter wheel, guide camera or electronic focuser, allowing you to manage your cables better. There are two short 0.5m USB2.0 cables included with the ASI1600 Pro.
The hub is powered by the external power supply if you connect one.
***
Skywatcher EQM35 specifications Source:
https://www.skywatcher.it/prodotto/eqm-35-pro/ The Sky-Watcher EQM-35 provides a convenient, stable platform for refractors up to 100mm or up to 127mm Maksutovs. Designed as an imaging system, it also works astonishingly well for visual use. This mount is perfect for the beginner to intermediate astronomer looking to expand their craft into astrophotography.
The removable dec assembly allows for the use of Star Adventurer L-brackets or ball head adapters, turning the mount into a heavy-duty tracking system for your DSLR or mirrorless camera and wide-field imaging.
German Equatorial heavy-duty tracking mount
22-pound payload capacity supports small- to medium-sized OTAs
High-precision hybrid stepper motors with 1.8° step angle and 64 micro steps
Compatible with Star Adventurer dec L-bracket and ball head adapter
Permanent periodic error correction (PPEC)
Dual- or single-axis tracking
Polar alignment with built-in polarscope
PC connection
Large 3.6-inch 180 tooth worm gear
Removeable dec assembly to convert to tracking mount
Includes two 7.5-pound counterweights
Improved RA gear for increased stability
***
William Optics Redcat 51 specifications Gently quoting
https://astrobackyard.com/william-optics-redcat-51/ RedCat 51 is an APO 250mm f/4.9 refractor telescope.
William Optics is a company known for creating high-performance apochromatic refractors and constantly updating and refining their designs.
The RedCat 51 Petzval APO is one of the latest creation from the company that can't sit still, and it is bound to shake up the industry once more.
The 4-element Petzval design, unique focal length, and helical focuser. The sleek red finish of the RedCat 51 signals its individuality and charm. It is unlike any other astrophotography telescope on the market.
The design goals for the RedCat included creating an affordable refractor that uses the highest quality glass and delivers a flat imaging field with unmatched color correction.
The 250mm focal length and F/4.9 focal ratio mean that the RedCat can be enjoyed as much by wildlife photographers as it is by amateur astrophotographers. The helical focuser makes focusing fast-moving targets such as birds much easier than ever before.
Optical Design: Petzval Apochromatic Refractor (4 elements in 3 groups)
Lens Type: Prime
Diameter: 51mm
Focal Length: 250mm
F-Ratio: F/4.9
Weight: 3.2 lbs
Focuser: Calibrated Helical
Mounting Style: Vixen/Arca-Swiss
First off, the RedCat 51 has a focal length of 250mm. What does this mean for astrophotography? It means extremely wide-field deep sky images. If you consider a 480mm refractor to be a wide-field 'scope, the RedCat is nearly twice as wide!
Massive deep sky objects such as the Carina Nebula will fit into the image frame in their entirety. Large nebulae that traditionally fill the frame in a typical wide-field setup are captured with plenty of surrounding space and additional star clusters and nebulae in the frame.
Until the RedCat came along, 250mm was a focal length reserved for those that employ a prime camera lens for astrophotography. Now amateur astrophotographers have the option of using a flat-field APO that easily mounts to their existing equatorial mount for deep sky imaging at this magnification range.
For wildlife photography, this focal length is also quite useful, especially when you consider the all-important f-ratio of this lens. 250mm is enough reach for many larger birds such as hawks and owls, but will require a steady hand and gimbal head for the best chance of a sharp shot.
For nature and wildlife photography, the RedCat 51 has a minimum focus distance of 3.7 meters. This can be improved to under 3 meters with the use of the 2? extension nose piece from the diagonal. By adding even more extension tubes, the RedCat can even be used for macro photography of small insects.
***
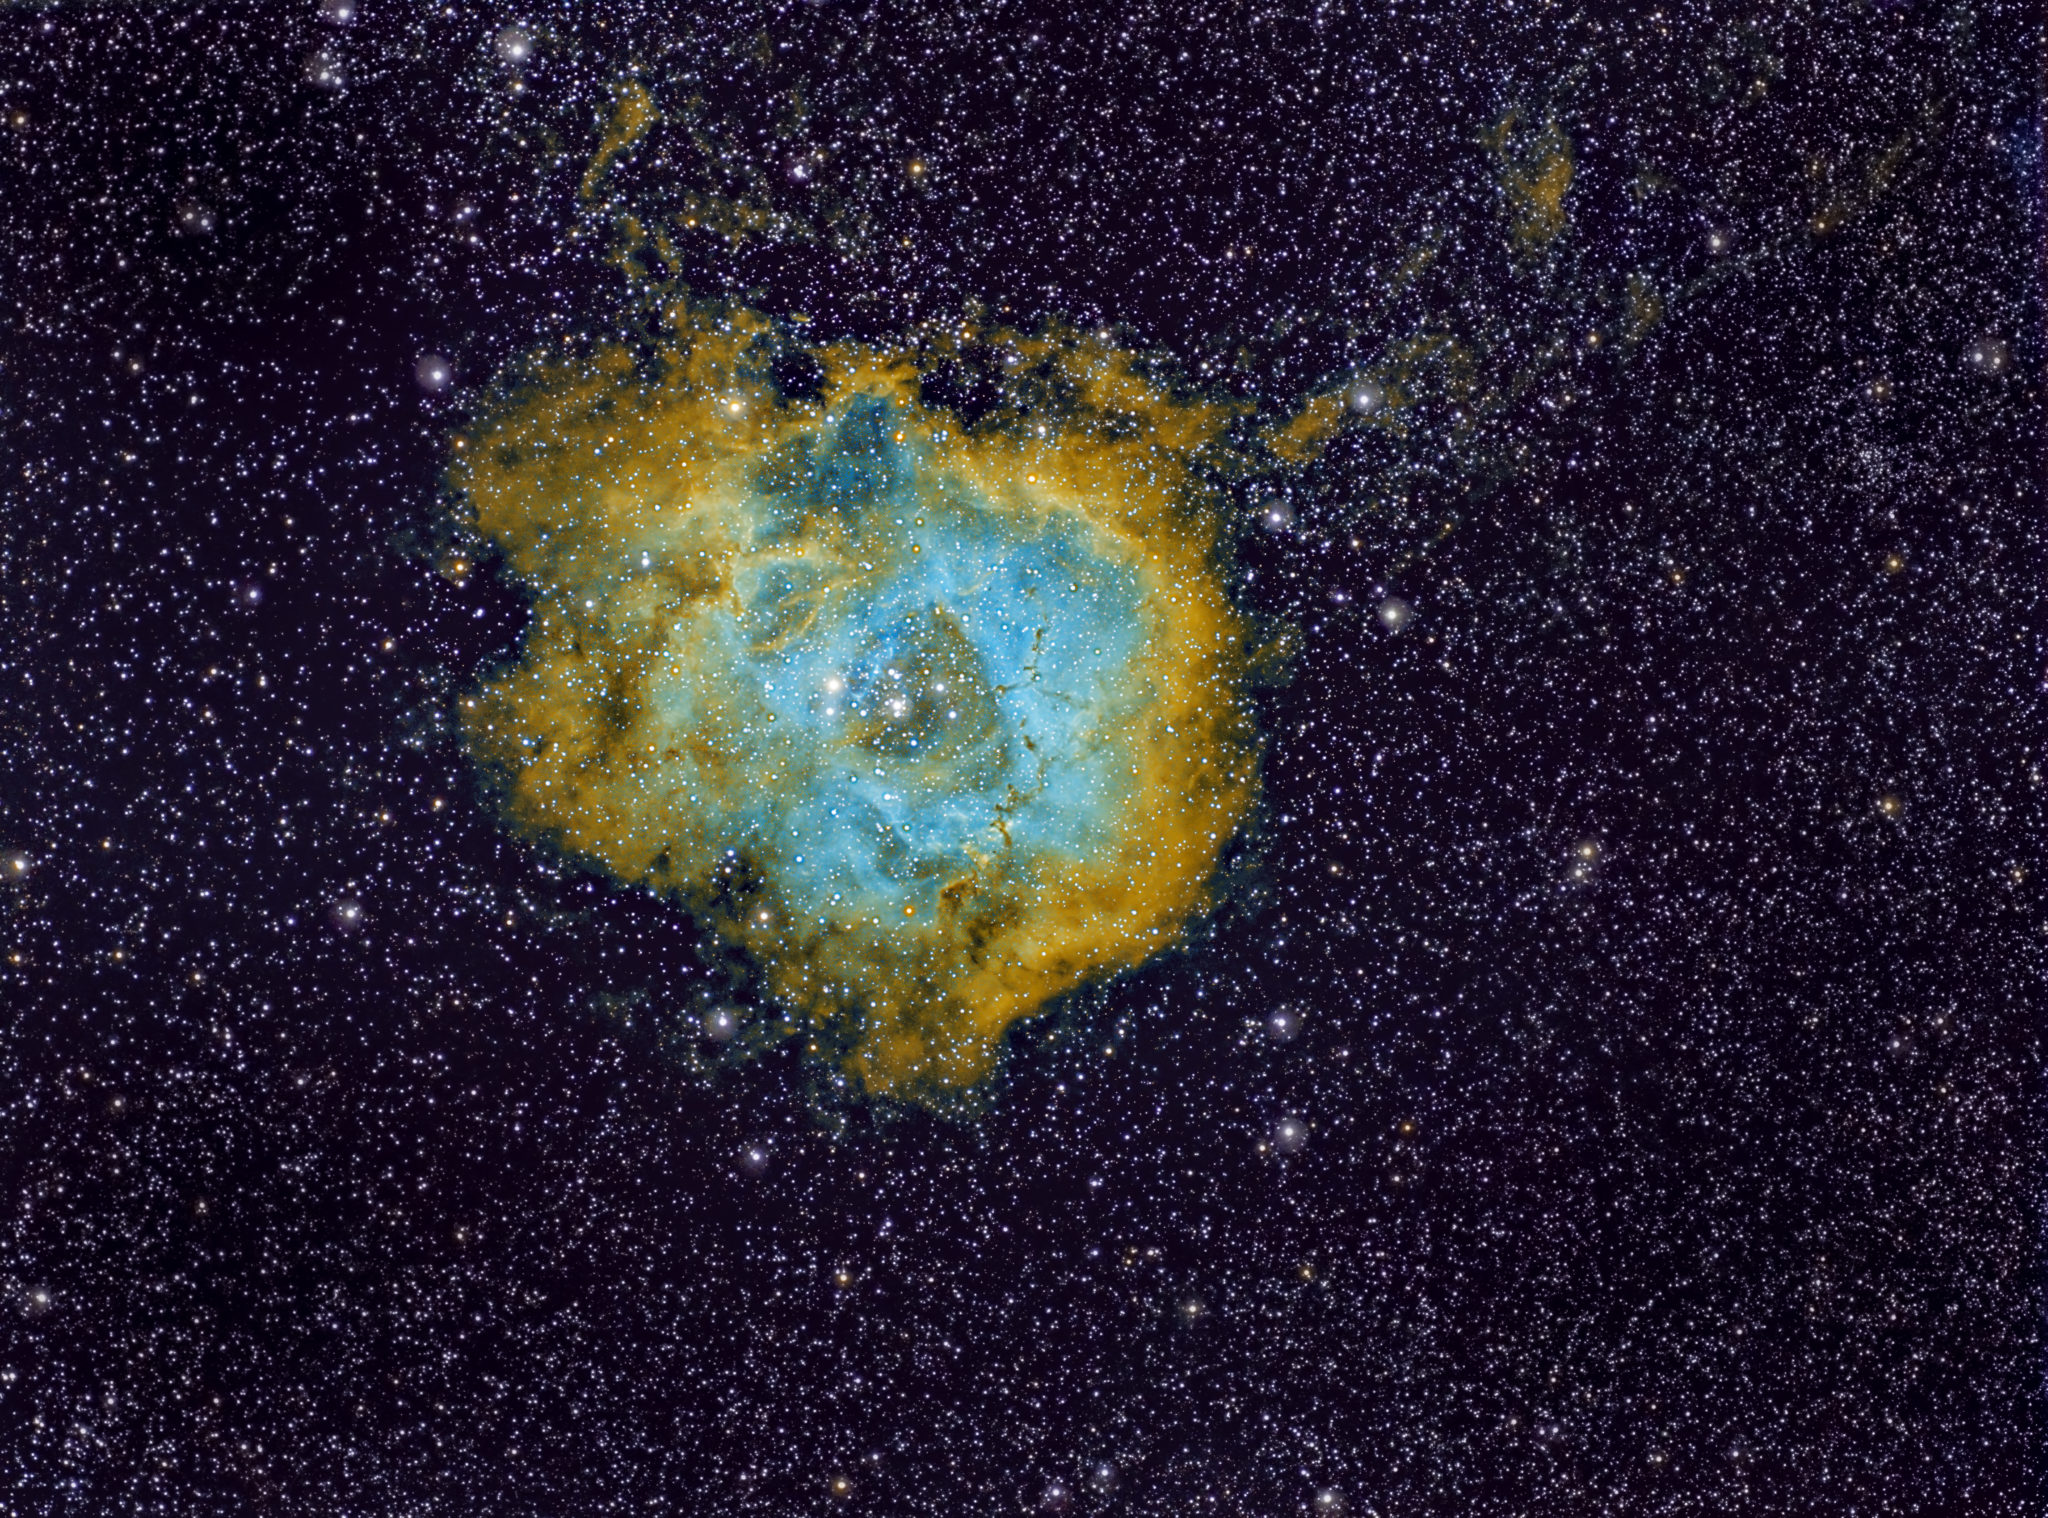
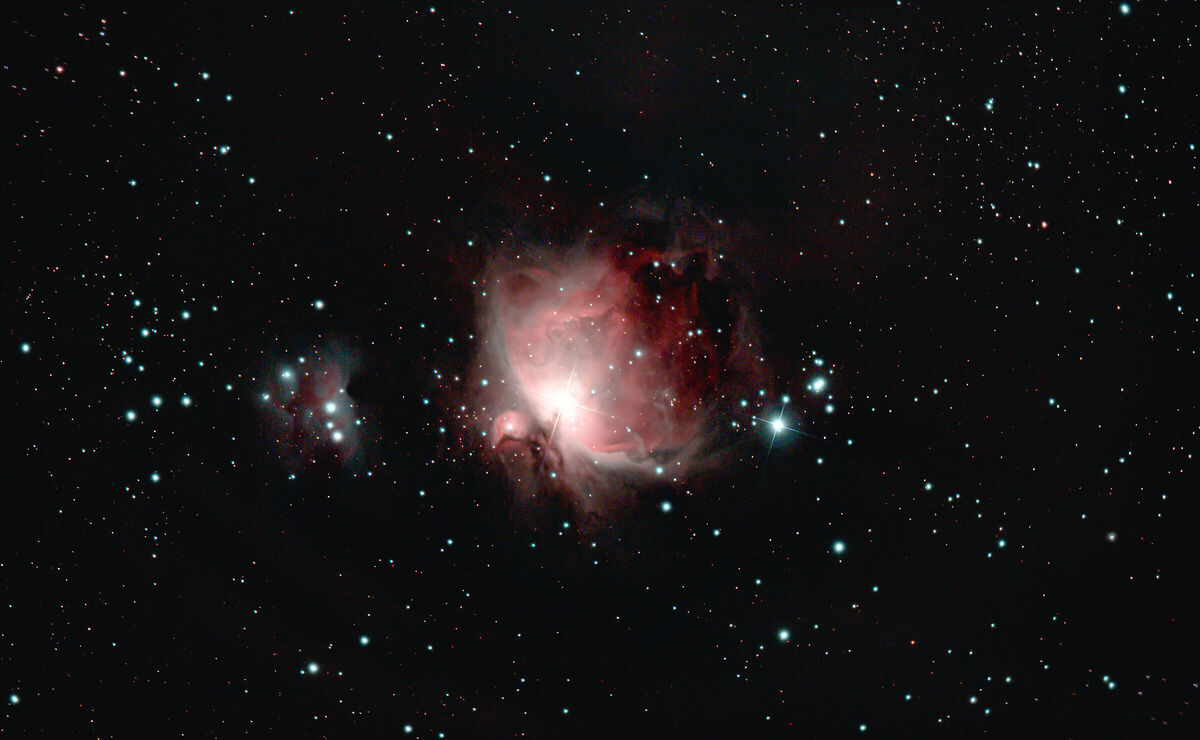
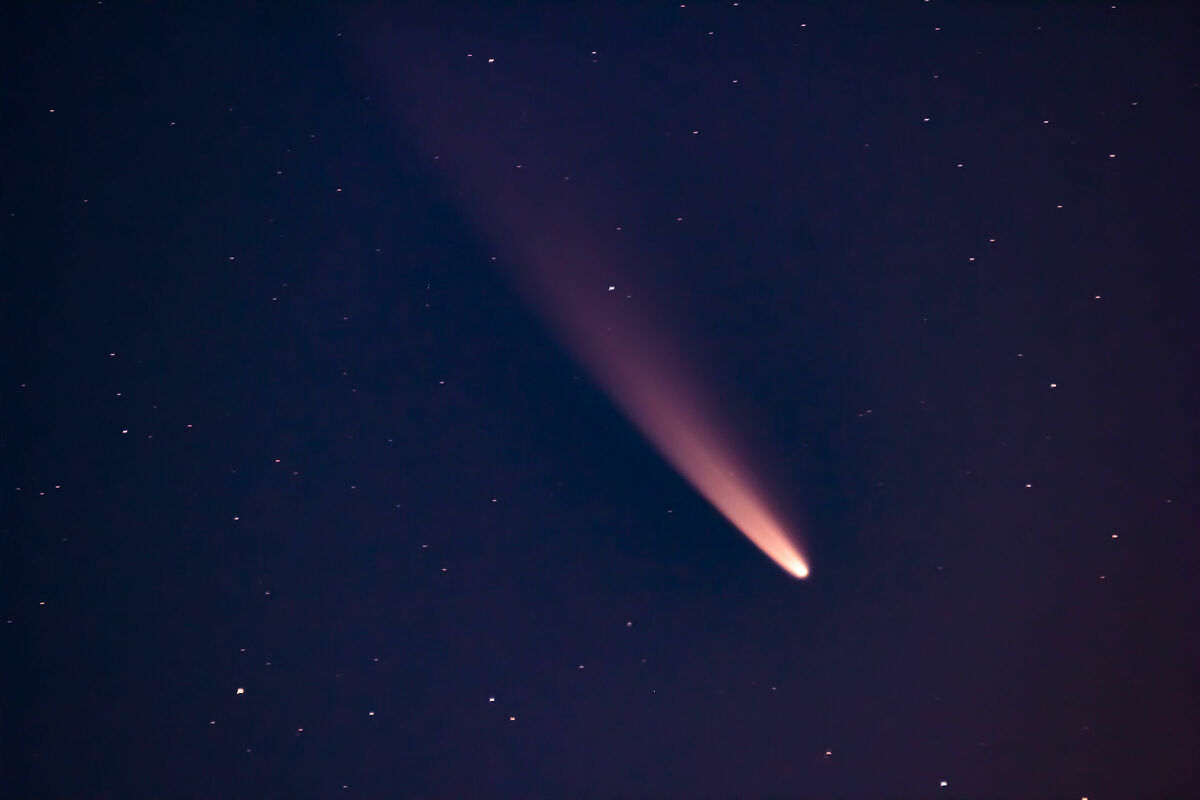
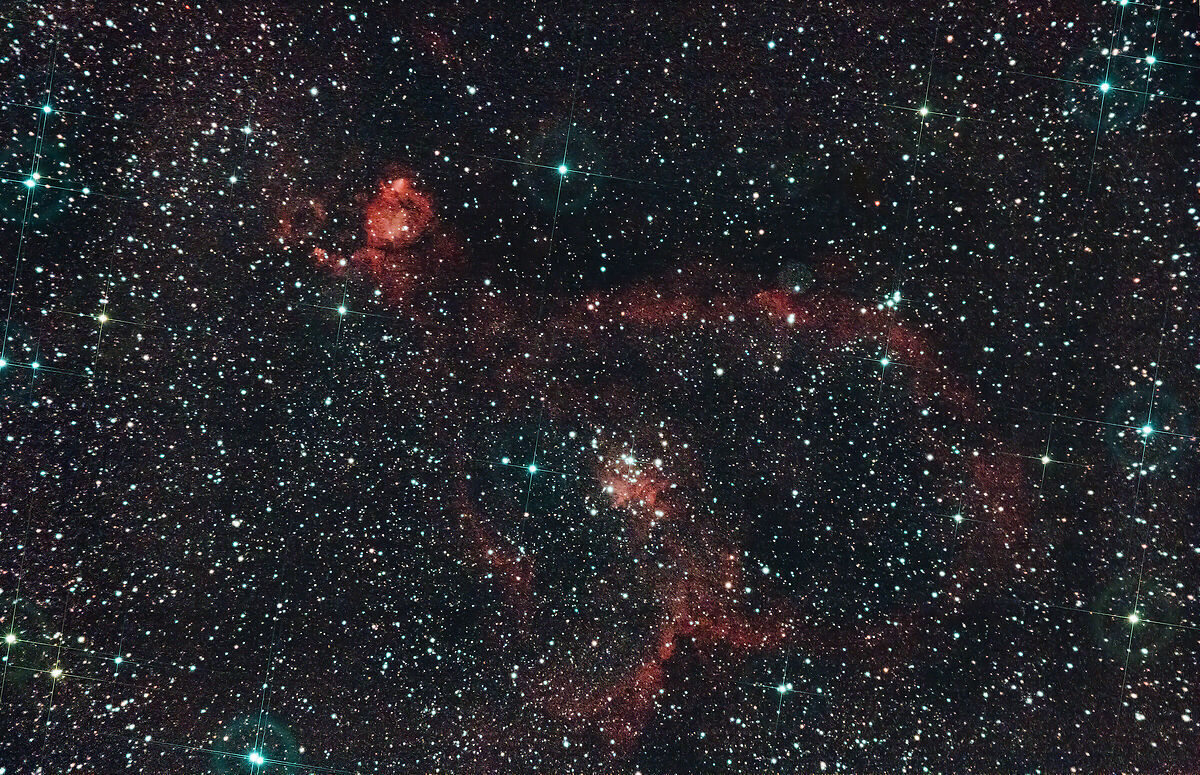
Some pictures taken by this astrophotographic setup NGC2237 Rosetta in SHO (Hubble) palette


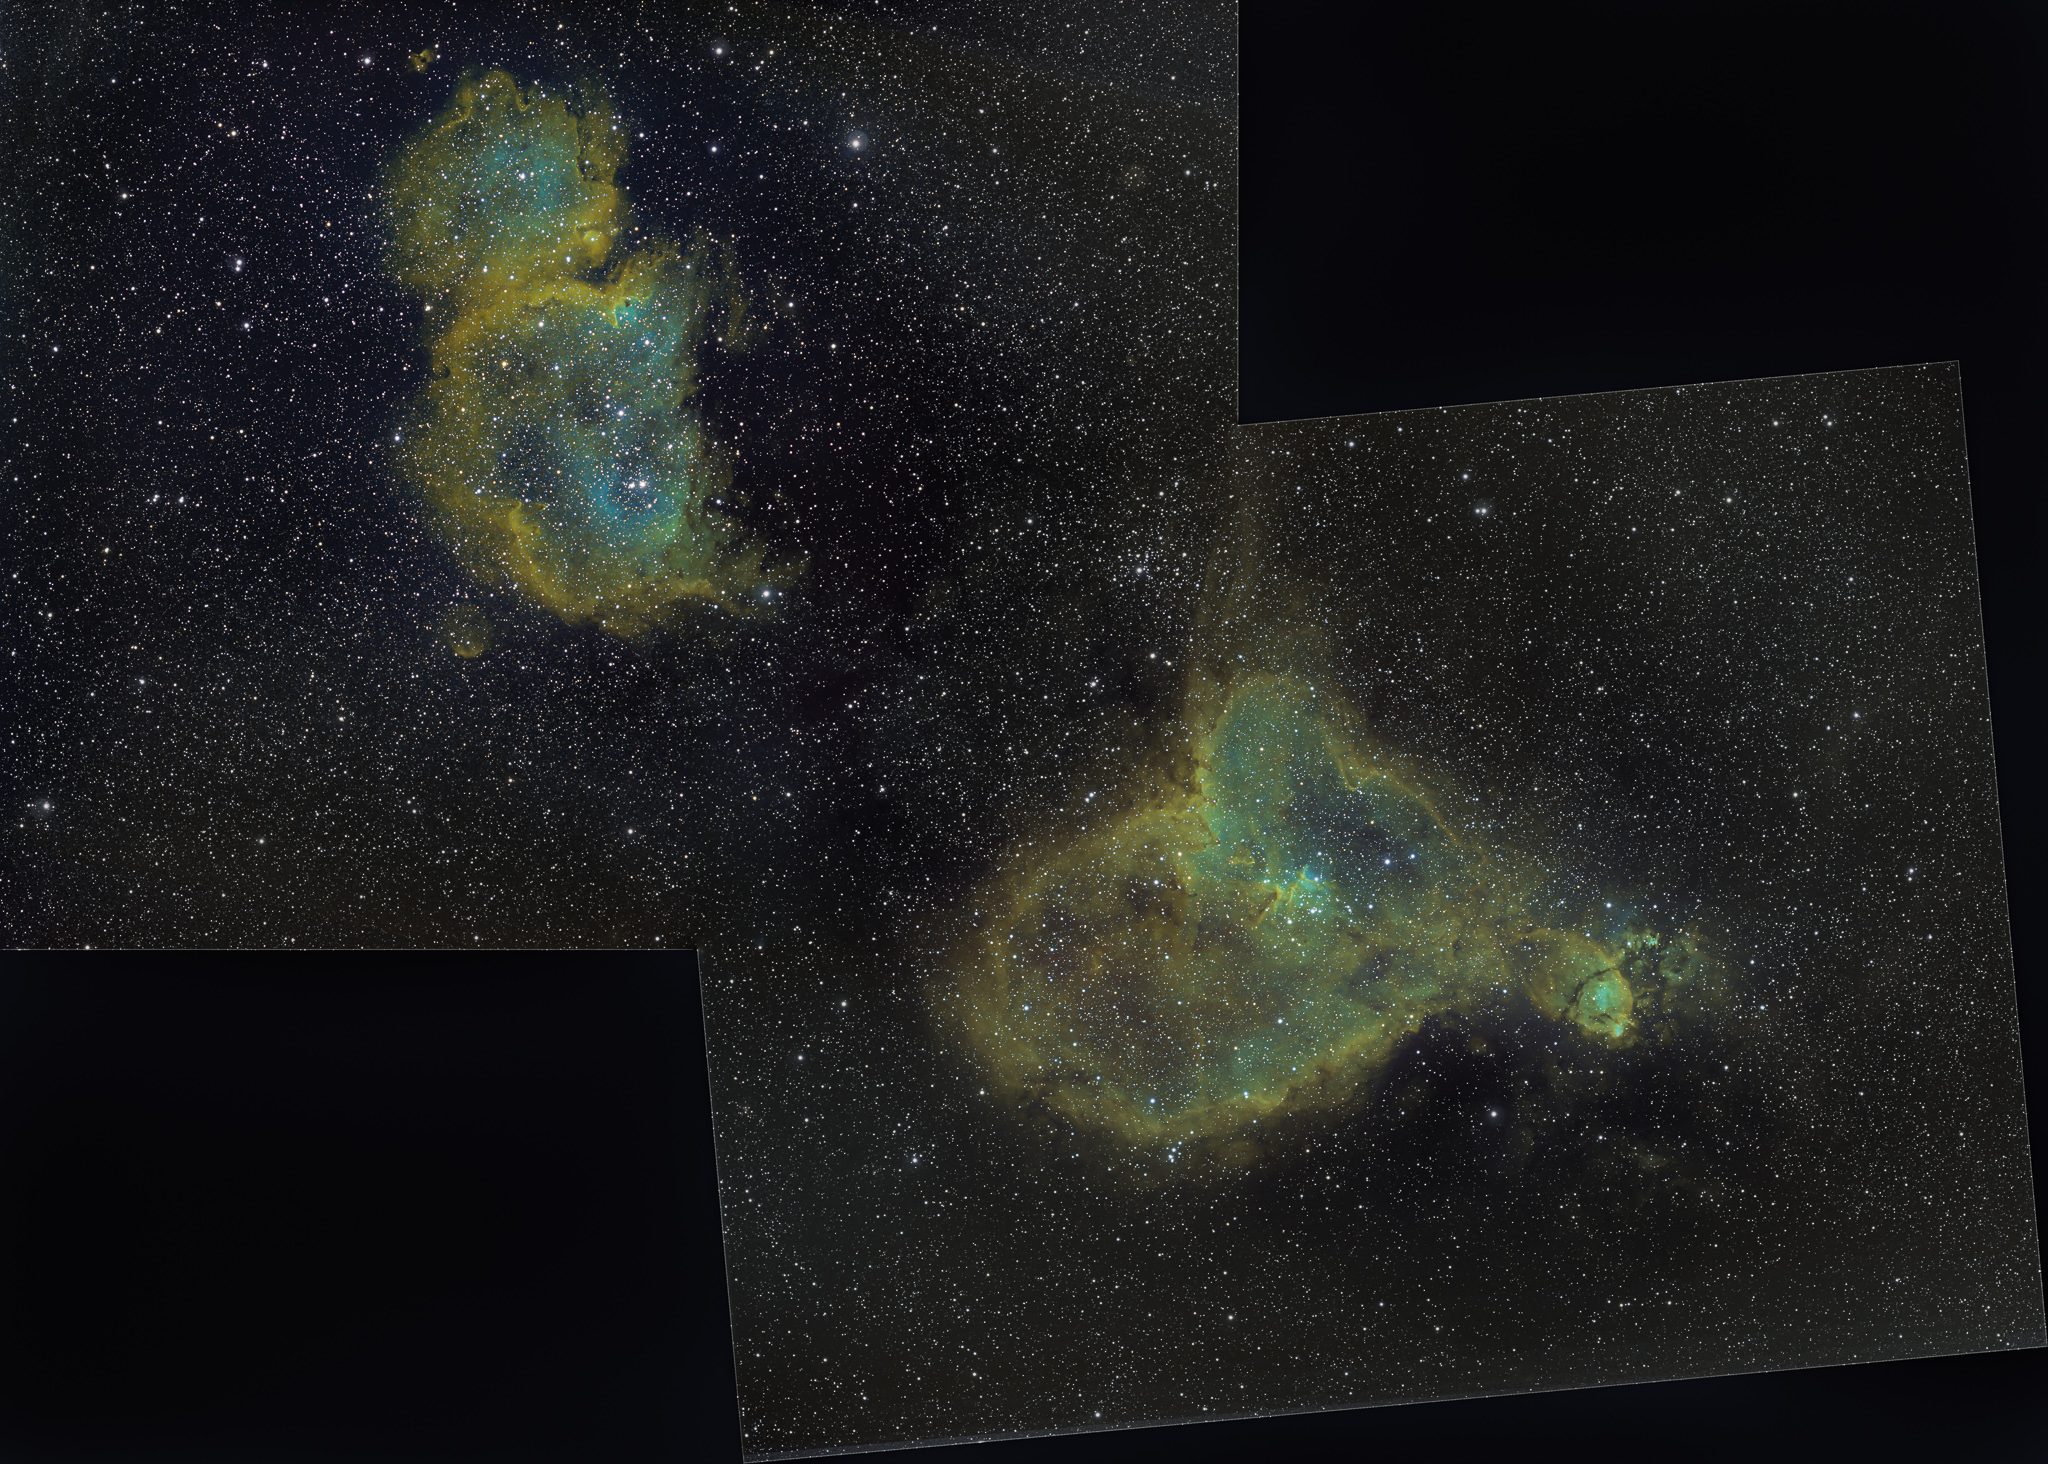
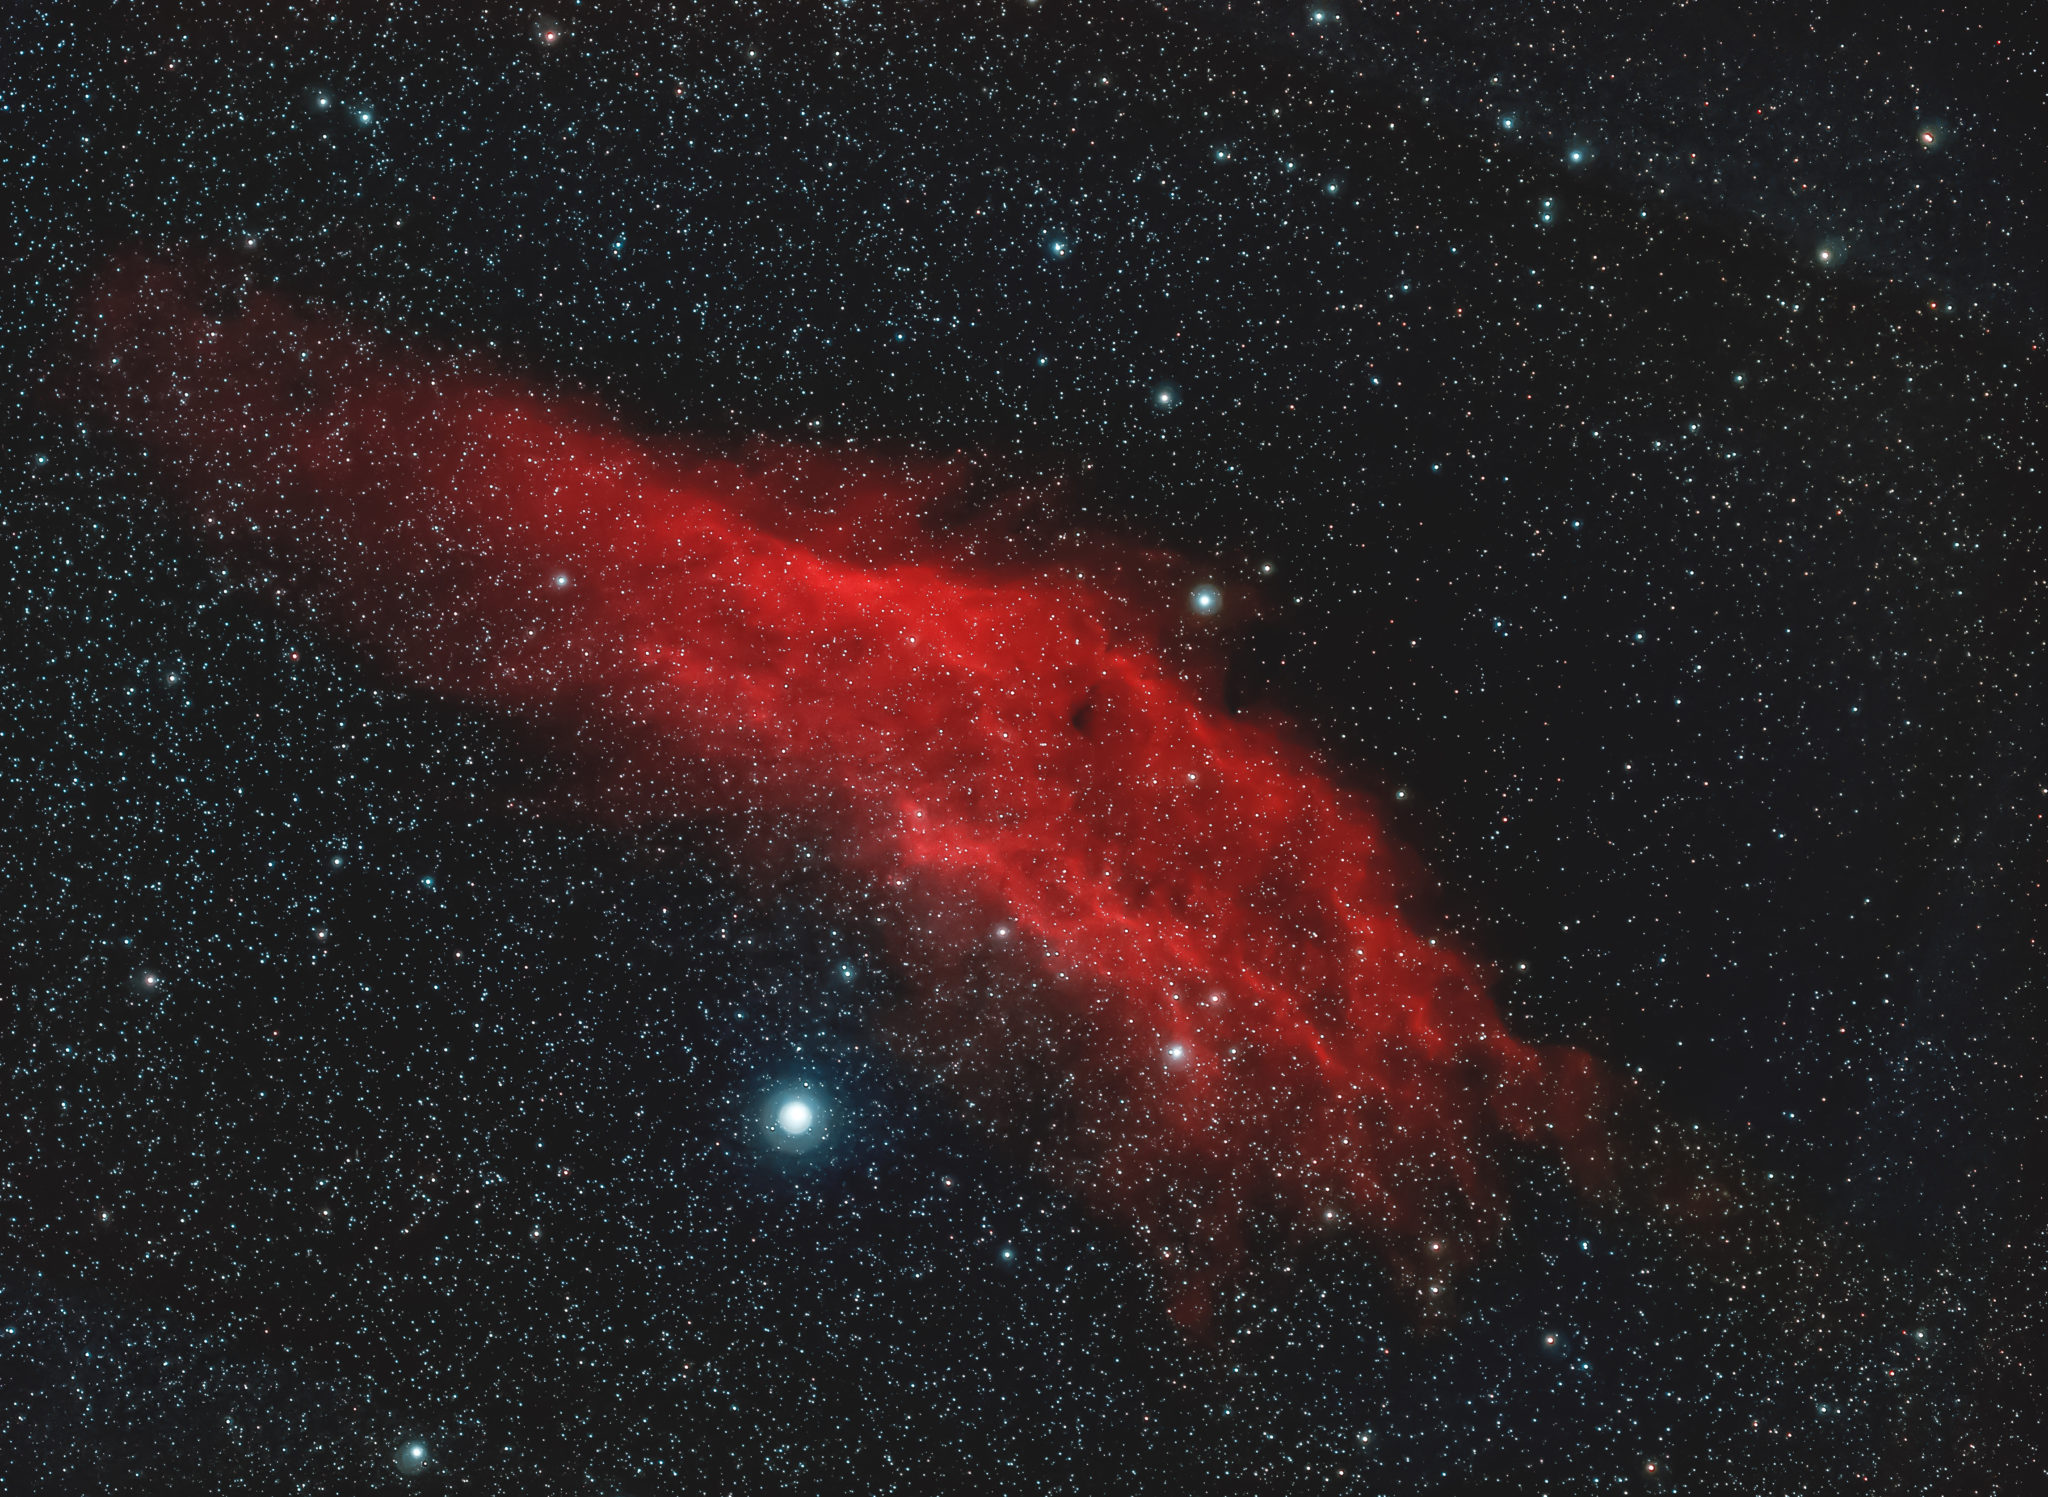
https://www.xiulong.it/tianwensheying/2021/10/04/ngc1499-california-nebula-in-hoo-palette/ Alnitak and Alnilam region, horse head nebula
[IMG2]4292294[/IMG]
Page on my Website:
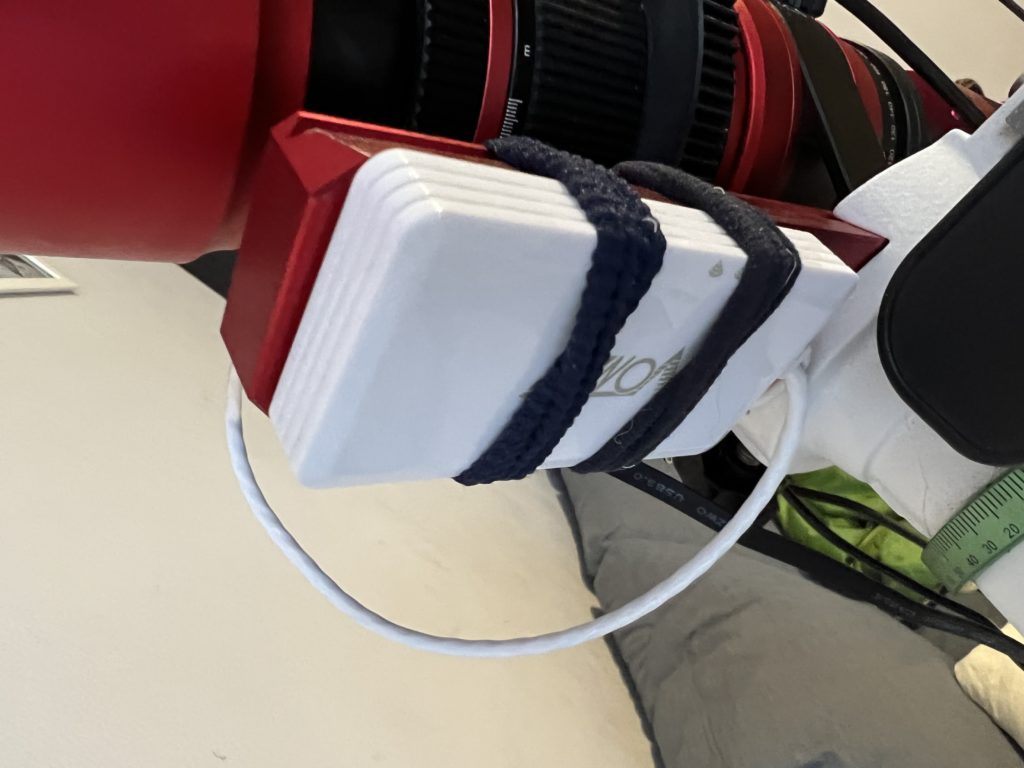
https://www.xiulong.it/tianwensheying/2021/05/10/ic434-ngc2024/ UPDATE June 2022 WO REDCAT 51 FLAP PANEL (FP1) by Deepskydad.com bought and applied on my Redcat, perfectly fitting and operating.
Connection by USB cable to old Raspberry/Astroberry server remote controlled by VNC client/server to open and close dust cover, setting heater and display luminosity for flat files recording.
It's the best product I strongly suggest!
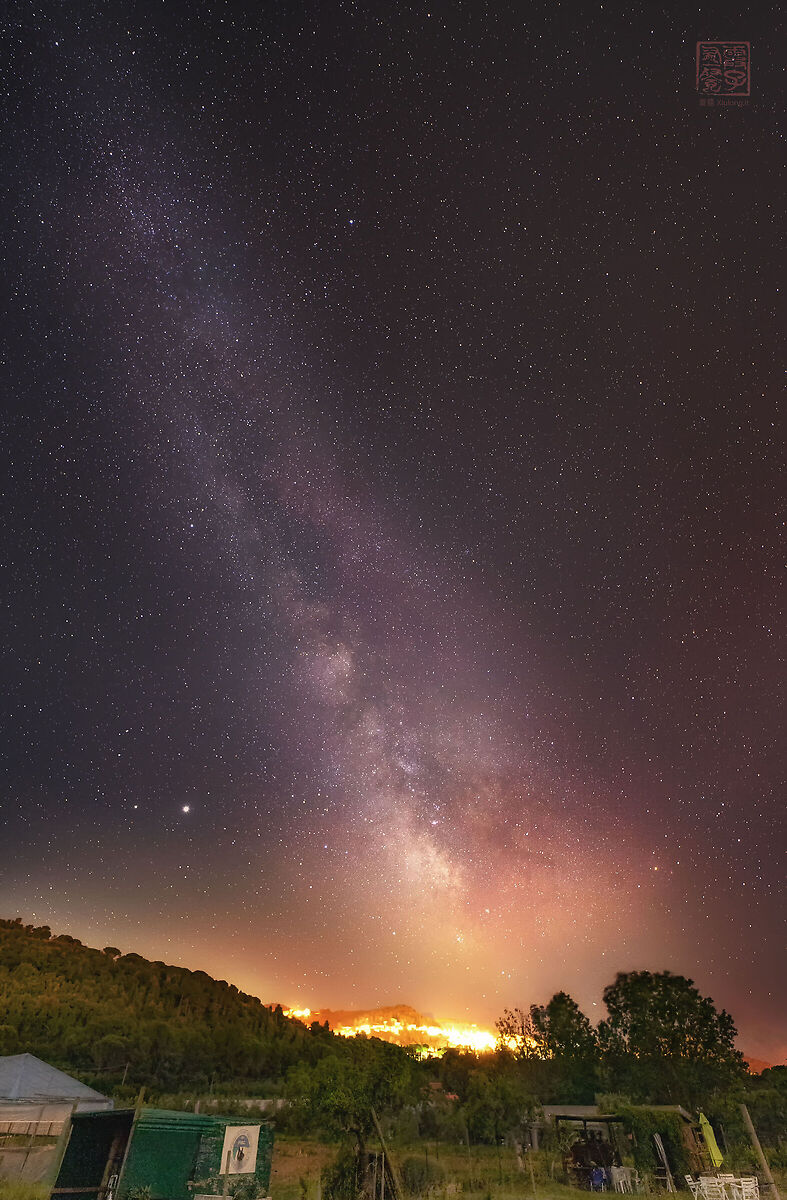
Update July 2022 A couple of Tapo wifi camera setup I implemented to grant video-surveillance of my gear and checking-up all setup condition on balcony from remote.
Risposte e commenti
Che cosa ne pensi di questo articolo?
Vuoi dire la tua, fare domande all'autore o semplicemente fare i complimenti per un articolo che ti ha colpito particolarmente?
Per partecipare iscriviti a JuzaPhoto, è semplice e gratuito!
Non solo: iscrivendoti potrai creare una tua pagina personale, pubblicare foto, ricevere commenti, partecipare alle discussioni e sfruttare tutte le funzionalità
di JuzaPhoto. Con oltre 260000 iscritti, c'è spazio per tutti, dal principiante al professionista.

 JuzaPhoto contiene link affiliati Amazon ed Ebay e riceve una commissione in caso di acquisto attraverso link affiliati.
