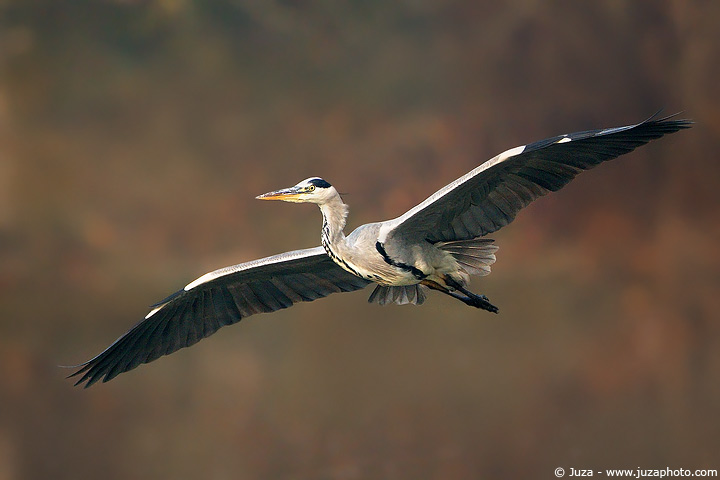
Grey Heron in Flight
Grey Heron in Flight, text and photos by
Juza. Published on 07 Giugno 2012; 0 replies, 6077 views.
Canon EOS 20D, Canon EF 600mm f/4 L IS USM, 1/2000 f/4, iso 400, tripod. Torrile, Italy.
Every time that I led a workshop about birds and wildlife I teach to photograph in every weather condition: sun, rain, fog or snow. Yesterday, the sky was quite cloudy and sometimes there was a light rain...moreover, there was even some fog, that remained for the entire day. Overall, the conditions were far from great, but even in these situations you can come back from the field with great photos.
When I've taken these photos there was still some fog, but the light was enough to get a fast shutter speed at ISO 400 f/4. Of course, the photo was pretty flat and "grey" - the tele lenses exacerbates the effects of fog and mist, but the subject still showed enough detail, so the photo could be recovered with good post-processing techniques.
When I opened the RAW file, the photo was like that:
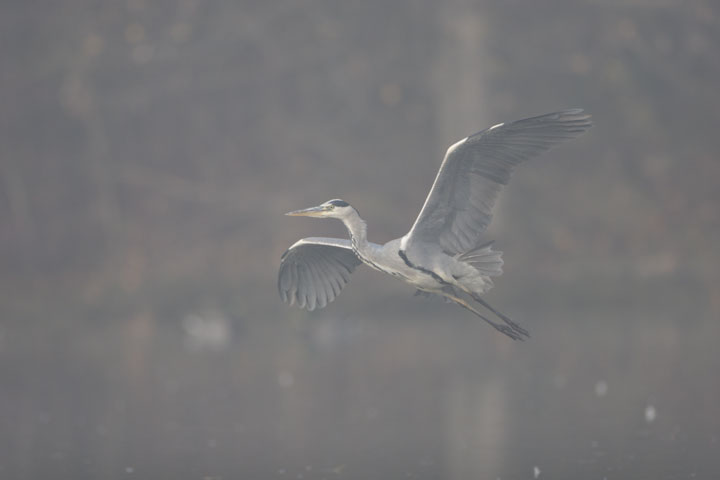
RAW file, just converted and resized, without any adjustment of contrast, sharpness, ect.
The real scene was not that bad, from what I remember it was something between this image and the processed photo. Remember that I converted the RAW with my usual approach of avoiding any enhancement of contrast, saturation or sharpness (as explained in the article Introduction to Adobe Photoshop) to get a untouched file with a low contrast but the maximum amount of detail, that I process exclusively with Photoshop...the tools of PS are far more advanced than those of Camera RAW.
As you can see, the head is in the center of the image...even though here I used AFPS (Automatic Focus Point Selection), keeping the subject in the center of the frame helps the AF; remember that when you select AFPS, the camera begins by using only the center AF area then, when the center area has focussed on the subject, the camera activates all the other AF areas to follow the subject identified by the center area.
Even though the difference between the RAW file and the processed photo is pretty noticeable, in this case the post-processing was relatively simple. I cropped the photo to improve the composition and I enhanced the contrast by dragging the black and the white sliders towards the edges of the histogram (with the Levels Tool of PS CS2), then I warmed up the colors to remove the slightl blue cast and I increased the saturation on +20. I removed the noise from background and subject with the Noise Reduction of PS CS2. Photoshop is a great help to recover the photos, but it can't do magic: you can recover contrast, color and saturation, but there must already be some color and contrast in the original photo. Moreover, you can not recover the sharpness: it is essential to use a sharp lens and perfect focus techniques to get razor sharp photos in-camera. The Smart Sharpen of CS2 helps to improve the detail of the photos that are already quite sharp, if the photo is out of focus the sharpening is useless.
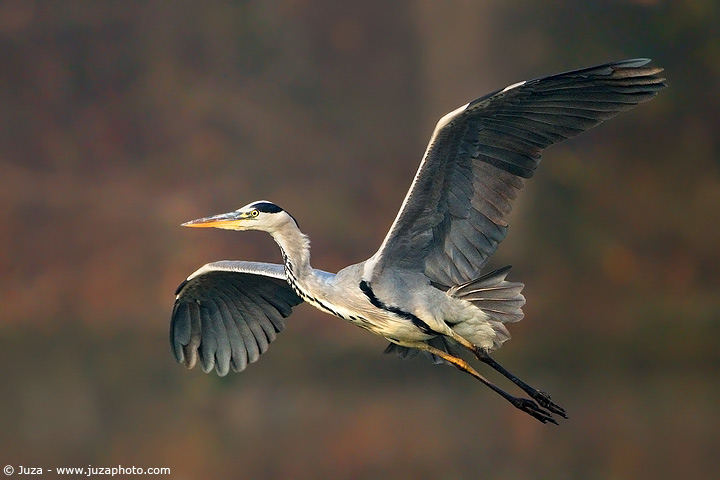
This is another photo of the same sequence:
Canon EOS 20D, Canon EF 600mm f/4 L IS USM, 1/2000 f/4, iso 400, tripod. Torrile, Italy. The burst of 5FPS of the Canon EOS 20D is a great help for wildlife photography. This photo is taken a fraction of second after the previous photo, but the bird had already moved some meters closer to the camera and it had a completely different wing position.
Replies and comments
What do you think about this article?
Do you want to tell your opinion, ask questions to the author, or simply congratulate on a particularly interesting article?
You can join the discussion by joining JuzaPhoto, it is easy and free!
There is more: by registering you can create your personal page, publish photos, receive comments, join discussions and you can use all the features of JuzaPhoto.
With more than 258000 members, there is space for everyone, from the beginner to the professional.

 JuzaPhoto contains affiliate links from Amazon and Ebay and JuzaPhoto earn a commission in case of purchase through affiliate links.
