What do you think about this photo?Do you have questions or curiosities about this image? Do you want to ask something to the author, give him suggestions for improvement, or congratulate for a photo that you really like?
You can do it by joining JuzaPhoto, it is easy and free!
There is more: by registering you can create your personal page, publish photos, receive comments and you can use all the features of JuzaPhoto. With more than 242000 members, there is space for everyone, from the beginner to the professional.
| sent on July 05, 2012 (13:40) | This comment has been automatically translated (show/hide original)
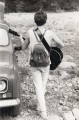
that sharpness! congratulations! che nitidezza! complimenti! |
| sent on July 05, 2012 (13:56) | This comment has been automatically translated (show/hide original)
Thanks Matthew, is a shot derived from a focus stacking not been successful for the displacement of the subject ... ;-) Grazie Matteo, è uno scatto derivato da un focus stacking non andato a buon fine per lo spostamento del soggetto... |
| sent on July 05, 2012 (14:08) | This comment has been automatically translated (show/hide original)
“ focus stacking „
but the focus stacking is to compose images with more focused? there is a special program to dial or is it all manual? " focus stacking"
ma il focus stacking è quello per comporre immagini con più messe a fuoco? esiste un programma apposito per comporlo o è tutto manuale? |
| sent on July 05, 2012 (14:11) | This comment has been automatically translated (show/hide original)
is exact there are specific programs, personally I feel good with photoshop that can do this kind of shots ... ;-) si esatto esistono dei programmi specifici, personalmente mi trovo bene con photoshop che può fare anche questo tipo di scatti... |
| sent on July 05, 2012 (15:24) | This comment has been automatically translated (show/hide original)
'' is exact there are specific programs personally I feel good with photoshop that can do this kind of shots ... ' ' cabbage ... interesting ... Rockstarblu info could you give us the details of execution THANK YOU ..! .... ''si esatto esistono dei programmi specifici personalmente mi trovo bene con photoshop che può fare anche questo tipo di scatti...' ' ...cavolo interessante...Rockstarblu potresti darci info nei dettagli di esecuzione..GRAZIE!.... |
| sent on July 05, 2012 (17:24) | This comment has been automatically translated (show/hide original)
I adore this shot! :-) Io questo scatto l'adoro!! |
| sent on July 05, 2012 (17:30) | This comment has been automatically translated (show/hide original)
What a sight! no words! BRAVO!! Che spettacolo! senza parole!! BRAVO!!!! |
| sent on July 05, 2012 (18:07) | This comment has been automatically translated (show/hide original)
Thanks David
Raffaella ... the classic shot that maybe you could get more ... but do you want for your posture or another, it is appreciated all the same ... ;-)
Yobre
There are various tutorials on the net, however, very briefly ...
First of all, with the necessary software (RAW Camera Raw, Digital Photo Professional, etc. ..) put in place all the basics. Or white balance, sharpness, brightness, contrast, etc. ...
I recommend it, the settings must be identical for the entire sequence of shots!
After doing this, open all the photos with Photoshop. To import all of the images in the same document and align them, each on a different level, open the "File" menu, click on "Script" then click on "Upload File in the series."
In the next window click "Add Open Files" and check "Attempt to automatically align the source images." Continue clicking OK.
After a few minutes you will have a new document with the images on different levels and aligned perfectly, or at least I hope. At this point I recommend that you close all other images, previously opened, so you find yourself only the last open document. In this way will free up more memory as possible, given that the operation that follows is rather heavy. But back to the main document. Almost certainly you will have to cut a little 'the image using the "crop", because the alignment will be created at the edges of the white parts or edges of thendesiderati.
Let us finally to the final stage.
Select all levels, open the "Edit" menu and click "Auto-Blend Layers." In the next window select the option "Create a series of images" and tick "Toni and uniform colors." Click OK.
When you are finished you will finally have the image with the maximum depth of field. In the layers panel you can now see the layer masks created by Photoshop. If the result does not satisfy you can if you wish, edit masks.
When the result is to your liking add the layers into one.
At this point if we need nor with the Clone Stamp can correct small imperfections. In fact, rarely happens that this operation creates an imageghost in some areas of the picture, especially in the edges of the subject.
Grazie Davide
Raffaella...il classico scatto in cui magari si poteva ottenere di piu...però vuoi per la postura o altro, si fa apprezzare lo stesso...
Yobre
ci sono vari tutorial in rete comunque molto brevemente...
Prima di tutto con i dovuti software di gestione RAW (camera raw, Digital Photo Professional, ecc..) mettete a posto tutte le cose fondamentali. Ovvero: bilanciamento del bianco, nitidezza, luminosità, contrasto ecc...
Mi raccomando, le impostazioni devono essere identiche per tutta la sequenza di scatti!!!
Dopo aver fatto questo aprite tutte le foto con Photoshop. Per importare tutte le immagini nello stesso documento ed allinearle, ognuna su di un livello diverso aprite il menu "File", cliccate su "Script" ed infine su "Carica File in serie".
Nella finestra successiva cliccate su "Aggiungi file aperti" e selezionate la casella "Tenta di allineare automaticamente le immagini sorgente". Proseguite cliccando su OK.
Dopo qualche minuto avrete un nuovo documento con le immagini disposte su più livelli ed allineate perfettamente, o almeno si spera. A questo punto vi consiglio di chiudere tutte le altre immagini, aperte precedentemente, in modo da trovarvi ad avere solo quest'ultimo documento aperto. In questo modo libererete più memoria possibile, visto che l'operazione che segue è piuttosto pesante. Ma torniamo al documento principale. Quasi sicuramente dovrete ritagliare un po' l'immagine usando la funzione "crop", perché l'allineamento avrà creato ai bordi dell'immagine delle parti bianche o dei bordi indesiderati.
Passiamo finalmente alla fase finale.
Selezionate tutti i livelli, aprite il menù "Modifica" e cliccate su "Fusione automatica livelli". Nella finestra successiva selezionate l'opzione "Crea serie di immagini" e barrate la casella "Toni e colori uniformi". Cliccate su OK.
Al termine dell'operazione avrete finalmente l'immagine con la massima profondità di campo. Nel pannello livelli potete ora vedere le maschere di livello create da Photoshop. Se il risultato non vi soddisfa potete, se volete, modificare le maschere.
Quando il risultato è di vostro gradimento unite i livelli in uno unico.
A questo punto se ce né bisogno con il timbro clone potete correggere le piccole imperfezioni. Infatti, capita raramente che quest'operazione crei un immagine fantasma in alcune zone della foto, soprattutto nei bordi del soggetto.
|
| sent on July 14, 2012 (12:05) | This comment has been automatically translated (show/hide original)
what to say except that it is amazing wow! che dire se non che è favolosa  |
user966 | sent on July 14, 2012 (12:25) | This comment has been automatically translated (show/hide original)
very nice hello molto bella ciao |
| sent on July 14, 2012 (15:00) | This comment has been automatically translated (show/hide original)
As you yourself pointed out, unfortunately you are not able to get everything in focus but still a great shot also pretty funny!
Luigi Bravo!
Max Come hai tu stesso evidenziato purtroppo non sei riuscito ad avere tutto a fuoco ma rimane un ottimo scatto anche piuttosto divertente!
Bravo Luigi!
Max |
| sent on July 14, 2012 (15:12) | This comment has been automatically translated (show/hide original)
A title fits perfectly for a shot of yours!
Congratulations ritrattone great and thanks for the tips on how to'' mix'' shots.
Always useful forum for everything.
Congratulations Louis and ... see you soon!
HELLO Un titolo azzeccatissimo per uno scatto dei tuoi!
Complimenti gran ritrattone e grazie per le dritte su come ''mescolare'' più scatti.
Sempre utile il forum per tutto ciò.
Complimenti Luigi e ... a presto!
CIAO |
| sent on July 14, 2012 (16:33) | This comment has been automatically translated (show/hide original)
Beautiful in tutto.wow!
Compliments.
Hello ;-) Bellissima in tutto.
Complimenti.
Ciao |
| sent on July 14, 2012 (17:19) | This comment has been automatically translated (show/hide original)
Thanks Simone
Lorenzo
Max
Maxspin
Gare
Roberto
thanks to all ... ;-) Grazie Simone
Lorenzo
Max
Maxspin
Gare
Roberto
grazie a tutti... |
| sent on July 14, 2012 (19:18) | This comment has been automatically translated (show/hide original)
“ When you are finished you will finally have the image with the maximum depth of field. In the layers panel you can now see the layer masks created by Photoshop. If the result does not satisfy you can if you wish, edit masks.
When the result is to your liking add the layers into one.
At this point if we need nor with the Clone Stamp can correct small imperfections. In fact, rarely happens that this operation creates a ghost image in some areas of the picture, especially in the edges of the subject. „
Thanks Luigi, works great ;-), I think I've opened to endless prospects with this mini tutorial, actually my laziness has always stuck performing this technique but so too is quick and easy, now impossible situations can become littlessibili :-):-D
great shot compliments ;-)
" Al termine dell'operazione avrete finalmente l'immagine con la massima profondità di campo. Nel pannello livelli potete ora vedere le maschere di livello create da Photoshop. Se il risultato non vi soddisfa potete, se volete, modificare le maschere.
Quando il risultato è di vostro gradimento unite i livelli in uno unico.
A questo punto se ce né bisogno con il timbro clone potete correggere le piccole imperfezioni. Infatti, capita raramente che quest'operazione crei un immagine fantasma in alcune zone della foto, soprattutto nei bordi del soggetto. "
grazie Luigi, funziona alla grande, mi sa che mi hai aperto ad infinite prospettive con questo mini tutorial, in effetti la mia pigrizia mi ha sempre bloccato nell'eseguire questa tecnica ma cosi è troppo facile e veloce, adesso situazioni impossibili possono diventare possibili
ottimo scatto complimenti
|
| sent on July 14, 2012 (21:52) | This comment has been automatically translated (show/hide original)
Great portrait, greetings and compliments.
ale Grandissimo ritratto, saluti e complimenti.
ale |
user1338 | sent on July 14, 2012 (22:45) | This comment has been automatically translated (show/hide original)
Amazing detail and great colors, great shot, congratulations.
Hello. ;-) Strepitoso il dettaglio e ottimi i colori, grandissimo scatto, complimenti.
Ciao. |
| sent on July 14, 2012 (23:31) | This comment has been automatically translated (show/hide original)
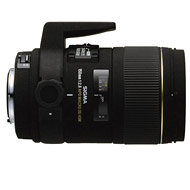
Fantastica! And this picture seems to confirm the quality of the sigma 150 macro that I was sugerito as a good buy ...
Ps: thanks for the tutorial! ;-) Fantastica! E questa foto mi sembra confermare la qualità del sigma 150 macro che mi è stato sugerito come ottimo acquisto...
Ps: grazie del tutorial! |
| sent on July 15, 2012 (13:16) | This comment has been automatically translated (show/hide original)
azzecatissimo title, very nice compliments titolo azzecatissimo ,molto bella complimenti |
|

Publish your advertisement on JuzaPhoto (info) |


 JuzaPhoto contains affiliate links from Amazon and Ebay and JuzaPhoto earn a commission in case of purchase through affiliate links.


 2.2 MEGAPIXEL
 Resize to fit window