Landscape Photography
The landscape photography is, in my opinion, the most challenging branch of nature photography. It is not difficult to master the technical aspects - after all, you just have to use the tripod to get the maximum sharpness and to pay attention to the exposure. So, what makes landscapes so difficult? You need an artistic eye to create great photos, images that captures a mood and transmit emotions to the viewer. While the techs can be explained, I can give only suggestions regarding the artistic side of landscape photography, then you have to develop you "vision" to capture truly unique photos.
A look to the techs
Lets begin with the easy things. First, which lens? While you can take great landscape photos with every lens, the wide-angles are the preferred choice. These lenses allows to capture the vastness of the landscapes, and they gives an exaggerated perspective that adds depth to the photos. If you use a DSLR with APS-C sensor, you can get a dedicate wide-angle as the Sigma 8-16mm; for fullframe cameras, instead, you can choose between several wide angles as the Sigma 12-24 or other Canon, Nikon, Sony 14-24, 16-35, 17-40, ecc. The Sigma 12-24 is wildly wide (it is the widest rectilinear lens currently available), while the 14-24 or 16-35 are slightly less wide, but they have a better quality, in particular in the corners.
These lenses have maximum apertures that ranges from the f/2.8 of the Nikkor 14-24 to the f/5.6 or the Sigma 12-24, but usually it doesn't matter much. For landscape photography, you will almost always use small apertures to get a large depth of field: I use f/8, f/11 or f/16 for nearly all my landscape photos. I recommend to avoid very small apertures, as f/32, because they lower the image quality due to diffraction, a phenomenon that reduces the sharpness and the contrast of the images.
Of course, generally the ISO sensitivity should be set on the lowest sensitivity available, ISO 100 or ISO 50. If you use ISO 50, you get even less noise in the shadows than ISO 100, but you lose one stop of dynamic range, so I don't recommend to use it in scenes that already have strong contrast. At low sensitivities, you have almost noiseless photos, wide dynamic range and overall excellent image quality; you can apply the sharpening without fearing to introduce noise artifacts.
As you can imagine, by combining small apertures and low ISO you get slow shutter speeds. Depending by the light, you might get a shutter speed between a fraction of second - sometimes even 1/250 or 1/500 - and several seconds, or minutes. Don't be afraid of very long exposures - with the recent DSLR, the hot pixels (the long-exposure noise) are very well controlled, and it is possible to take exposures of minutes without any problem.
If you are seriously interested in landscape photography, I highly recommend to use a tripod. The tripod is essential to take sharp, detailed photos, in particular at the slow shutter speeds typical of landscape photography. Moreover, it allows to compose carefully the photo, it gives you more time to think about composition and techs. With the tripod, you can use particular techniques as blended exposure: for sunrises and sunsets, I often taken two shots of the same scene, one exposed for the sky and one for the foreground, then I blend them to create an unique photo with a super-wide dynamic range. If you shoot handheld, it would be impossible to take two absolutely identical images of the same composition.
I recommend to avoid filters, with the exception of the polarizer. UV and "protective" filters are pretty useless (actually, they may lower the image quality, reducing sharpness and increasing the risk of flare), and the "artistic" filters can be replicated - with much better results and finer control - using Photoshop.
The light and the mood
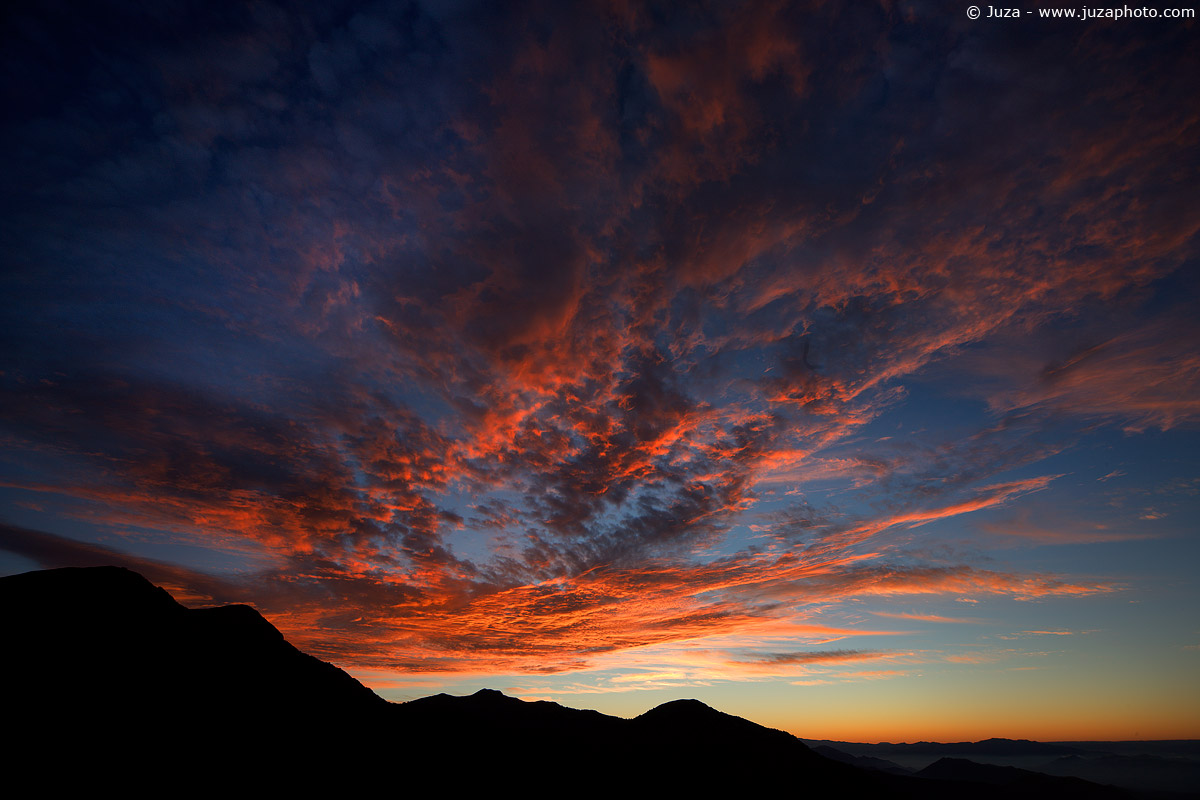
The light is and essential element of landscape photography. Great light can transform even an uninteresting subject into a fantastic place and, conversely, bad light ruins even beautiful subjects. A bright sunny day, with a cloudless sky, is one of the worst light conditions that I can image - ironically, many beginners consider it excellent. Great light is not the bright light of mid-day: the best light is at the edges of the days. At sunrise or sunset, there is a warm, soft light that caress the landscape. The shadows are bright, and the colors are warm, strong and very pleasing to the eyes.
You have to get up early and stay up late to capture the landscapes in that light - but the results are well worth the efforts. When possible, I do trips longer than one day, and I place the tent in panoramic places, or I sleep in huts placed in the most beautiful areas of the zone that I'm visiting. Sometimes, you can take fantastic images well before sunrise - it is actually possible to take landscape photos even at night. Whenever possible, I'd recommend to include the moon or the starry sky; they adds a lot the the photo. Villages and cities are particularly beautiful at night: few lights into the darkness creates truly unique images.
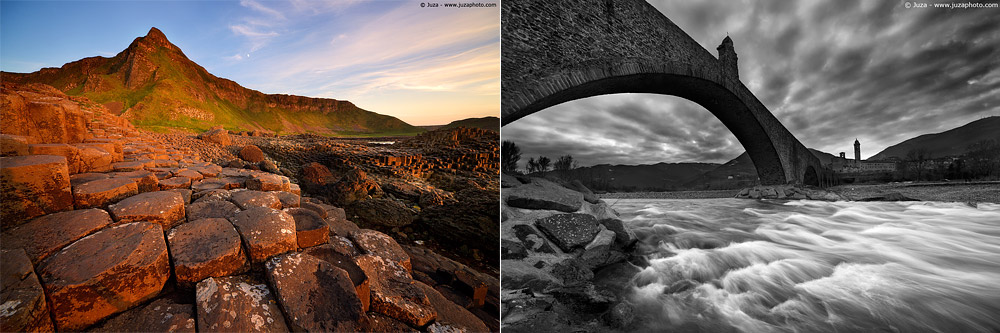
Left: the warm, soft light of sunrise or sunset always add "something special" to the photos. Right: in less than ideal light conditions, you can try the conversion to black and white: sometimes images that looked dull in color make great B&W photos.
If you don't have to possibility to wait for sunrise or sunset, and you have to take the photo during the central hours of the day, there are some "strategies" to get the best from the less-than-ideal light. If there is a flat blue cloudless sky, crop it out as much as possible. If the sky is interesting, instead, you can try to include it has part of the composition. A polarizer filter, here, helps to increase the contrast between the clouds and the sky, and to darken the tone of blue.
If there is a subject in the near foreground (for example, a person), you can try to reduce the contrast and to brighten up the shadow with some fill-flash - the professional units, as the Canon 580 EX, covers even super wide angle lenses, up to 14mm on a fullframe camera. Another possibility is to convert the photo to black and white. In B&W, even photos taken in harsh light may look great, but not every image can be converted to B&W with good results. The photos that gives the best results are those that are rich of textures, lines and graphic elements; other photos might look just "flat" when converted to B&W. To get the best results, I'd recommend to use the Photoshop's "Black and White" tool, instead of the "Desaturate" option: the former allows to get a much finer and more creative control over the conversion.
Sunrises, night and mid-day are not the only situations where you can photograph. When the sky is overcast, and even under heavy rain, it is possible to take excellent photos. The clouds and the stormy sky adds mood to the photos, and they allow to take landscape images that are very different from the classic "tourist" views. The same place has very different looks depending by weather, hour of the day, season and other variables: if a place look promising, try to come back various times to take photos in different conditions. Don't be afraid to photograph under rain or snow - with a bit of attention, there are not big risks; you can protect the camera with a plastic bag.
The rule of thirds and exceptions
A good composition is essential for landscape photography, but it is the most difficult thing to learn. There are some "rules" that helps to improve the composition, but you have to develop your own creative vision to create truly unique images. The most common error of beginners is to place the horizon right in the center of the image. Usually, the result is a static, unbalanced image: the first step to improve the composition is to frame the landscape according to the "rule or thirds". What does it mean? Pretty simple: imagine to divide the frame in "thirds". You can frame the photo with 1/2 of foreground and 2/3 of sky, or 2/3 of foreground and 1/3 of sky: in other words, you have to create and asymmetric composition.
The following images show examples of photos composed with and without the rule of thirds. The choice more foreground/more sky is not arbitrary - you have to analyze the scene, and decide which area of the landscape you want to emphasize in your image.
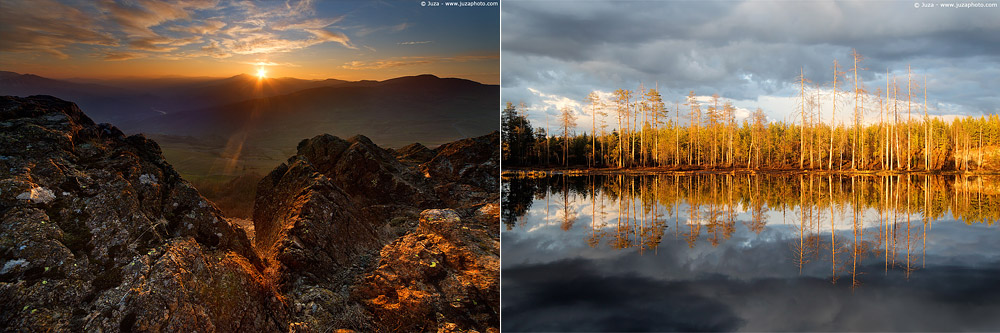
Left: this photo has been composed according to the "rule of thirds": two thirds of the photo are foreground, and only one third is sky. Right: this scene had a strong symmetry, so I preferred a centered composition.
Of course, the rule of thirds is not the right solution for every photo. If the subject has a clear symmetry, you will get the best results placing the line of symmetry in the center of the image. The most common symmetric subject are reflections: placing the horizon line in the centers usually creates a well balanced composition, and the symmetry gives a strong, eye-catching composition. Other than reflections, many man-made objects and buildings have some symmetries or graphic elements. Look carefully your subject from different points of view to find to most attractive composition.
Foreground and perspective
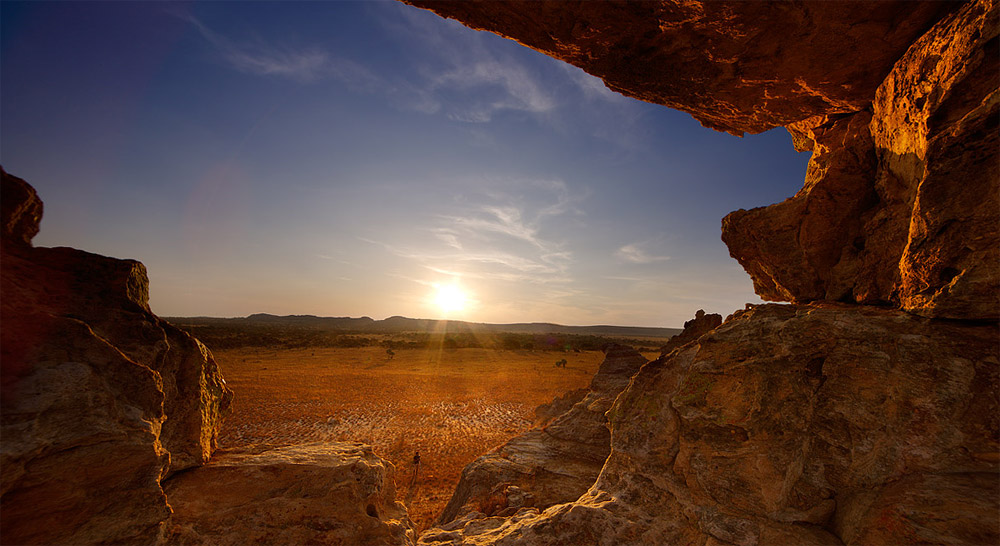
One of the most effective ways to create a strong composition is to place something in the foreground: a flower, a rock, or any other interesting object. The object into foreground, combined with the exaggerate perspective of the wide-angle, gives depth and a "3D" look to the photo. The photo above is an example of this concept. The rocks in the foreground were at few centimeter from the lens (a 12mm wide-angle), while the mountains into background are kilometers away. I used a very small aperture, f/16, to get everything in sharp focus.
In landscape photography, you should always use manual focus, and when you use wide angles to frame a subject in the near foreground, the manual focus is even more important. Usually, I focus on 1-1.5 meters when the closest object is few centimeters from the lens, or 2-3 meters when the closes objects is at 50-70cm from the lens. I stop down to f/11 or f/16 and I take the photo: usually, the depth of field is enough to have everything in focus, and even if the very first foreground is slightly out of focus, it doesn't detract too much from the photo. I'd recommend to avoid f/22 or f/32 unless it is strictly necessary, since at these apertures you lose image quality (sharpness and contrast) due to diffraction.
If you specialize in landscape photography, you might consider the unusual tilt and shift lenses, as Canon 24mm TSE or 17m TSE. The shift movement allows to avoid the converging lines when you photograph something from a "low to high" perspective. The tilt allows to control the depth of field: by tilting the lens parallel to the subject, you can increase the depth (very useful for landscapes where you want to get a sharp photo from the close foreground to the background). You can even use this lens creatively, tilting the lens in the opposite direction respect the subject: the depth of field becomes incredibly shallow, and it allows to create very original image.
Pay attention to the legs of the tripod: with ultra-wide angles, it is easy to include unwanted elements, in particular when you photograph close to the ground and the tripod's leg are spread wide open. With fisheyes, often it is impossible to avoid the tripod into composition, and it need to be cloned out during post processing.
Other elements of the composition: leading lines, diagonals and textures
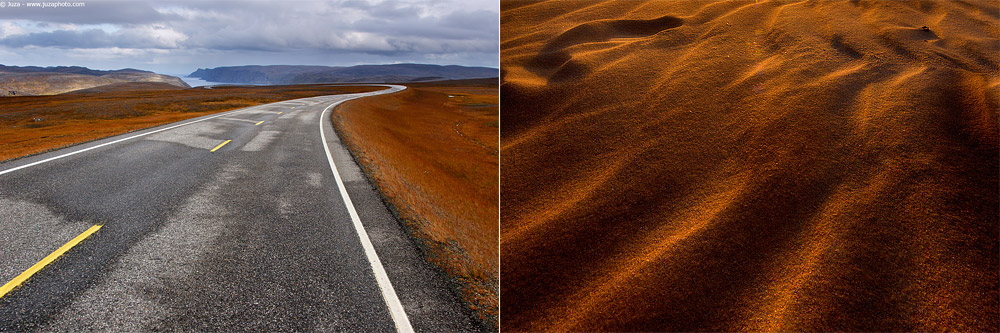
Left: this photo show both use of diagonals and leading lines Right: the sand often makes a great texture.
There are many elements in nature that helps to create a powerful composition: the diagonals are one of the most important. You can use diagonal lines to led the eye towards the subject, or to create graphical elements and symmetries. If you look carefully to the landscape, you will notice that there are are both "explicit" diagonals (as the slope of a mountain) and "implicit" diagonals (for example, a series of objects placed diagonally). You can frame these diagonals as you want, but usually they should not intersect with the corners of the image, otherwise the photo looks a bit "artificial" and studied.
Sometimes you don't need diagonals to create "leading lines": even a curve or a straight line can be used to lead the observer through the frame. Roads and trails are an excellent example of "leading lines" for your composition, in particular when you photograph with a wide-angle and the beginning of the road is in the close foreground. "S", "Z" o "V" curves, and other graphic elements, helps to create strong composition. When you observe the landscape, pay attention to these lines and shapes, and try to use them in your composition. The patterns (repeated shapes) and the textures are other elements for your composition. While it is difficult to see patterns in nature, you can often see textures: the fine grain of the sand, the bark of a tree, the rocks and many other subjects have interesting textures.


 JuzaPhoto contains affiliate links from Amazon and Ebay and JuzaPhoto earn a commission in case of purchase through affiliate links.