Macro and Flora Photography
Macro photography allows to discover a whole new world of weird, colorful and fascinating creatures, that you often miss by naked eye: it is like exploring another planet! Subjects for macro photography can be found nearly everywhere, and you don't need a particularly advanced camera for macro photography: all SLRs currently in production have enough resolution and relatively low noise (at least at low ISO; the majority of my macro photos had been taken between 50 and 400 ISO). That said, to get good results it is necessary to master the techniques, and to have a lot of patience.

Marbled White - Canon EOS 1Ds Mark III, Canon EF 180mm f/3.5 L USM, 2" f/16, iso 100, tripod. Sesto Fiorentino, Italy.
Macro lenses
There are many ways to take macro photos. The easiest solution is to buy a dedicated lens: a "macro" lens can focus much closer than a "non-macro" lens, and usually it reaches 1:1 reproduction ratio. The majority of macro lenses offer very good image quality, high contrast, great sharpness and few or none optical aberrations; often you can get very good results even with 1.4x and 2.0x teleconverters.
Currently, all macros have autofocus, and some have even ultrasonic AF motors (as the Canon 180 Macro USM, the Sigma 180 HSM, the Nikkor 105 VR AF-S), but the focus is relatively slow because the AF has to search the focus between a very wide range of distances; you can get a slightly faster AF using the Focus Limiter, that reduces the AF range, or pre-focusing manually (thanks to Full Time Manual Focus you can switch from AF to MF in every moment). That said, the 99% of my macro photos is taken in manual focus, so I really don't care about AF in a macro lens.
The focal length is very important. Macro lenses range from 50mm to 200mm; even though both a 50 Macro and a 180 Macro reach the same magnification (1:1), the longer lens gives a much more out-of-focus background and more
working distance. When you look at the specifications of a macro lens, you have to pay attention both to the focusing distance and the working distance. The focusing distance, as you already know, is the shortest distance where you can focus: but this is not the actual distance between you and the subject, it is just the distance between the focus plane (the sensor) and the subject. In macro photography, it is very important to know the working distance - that is the distance between the front element of the lens and the subject. For example, with a 50mm Macro you have a minimum focusing distance of 19 centimeters, but actually the distance between the front element and the subject is just 7 centimeters, and if you mount the lens hood, this distance is further reduced to 4-5 centimeters. As you can imagine, it is not easy to get so close to a butterfly or another animal: this is one of the reasons to prefer a long lens for macro photo. The following table lists the focusing distance and the working distance for the most common macro focal lengths.
����| � Focal Length | � �Focusing distance at 1:1 | � �Working distance at 1:1 (without hood) |
�
| �50 mm | � �19.0 centimeters | � �7.0 centimeters |
�
| �60 mm | � �22.0 centimeters | � �9.1 centimeters |
�
| �70 mm | � �25.7 centimeters | � �10.7 centimeters |
�
| �90 mm | � �29.0 centimeters | � �12.0 centimeters |
�
| �100/105 mm | � �31.0 centimeters | � �14.0 centimeters |
�
| �150 mm | � �38.0 centimeters | � �18.8 centimeters |
�
| �180 mm | � �46.0 centimeters | � �23.8 centimeters |
�
| �200 mm | � �50.0 centimeters | � �25.2 centimeters |
�
| �250mm (180 + 1.4x) | � �54.0 centimeters | � �30.1 centimeters |
�
| �360mm (180 + 2.0x) | � �64.5 centimeters | � �37.3 centimeters� |
�
Another advantage of long lenses is the tripod collar: when the lens is mounted on the tripod, the collar offers a fourth axis of movement, it is an huge help, in particular for vertical photos.
The majority of macro lenses have an aperture between f/2.8 and f/4. In my opinion, the widest aperture does not have much importance in a macro lens, since at these magnifications you will often stop down at least to f/8 to get a good depth of field.
Teleconverters in macro photography
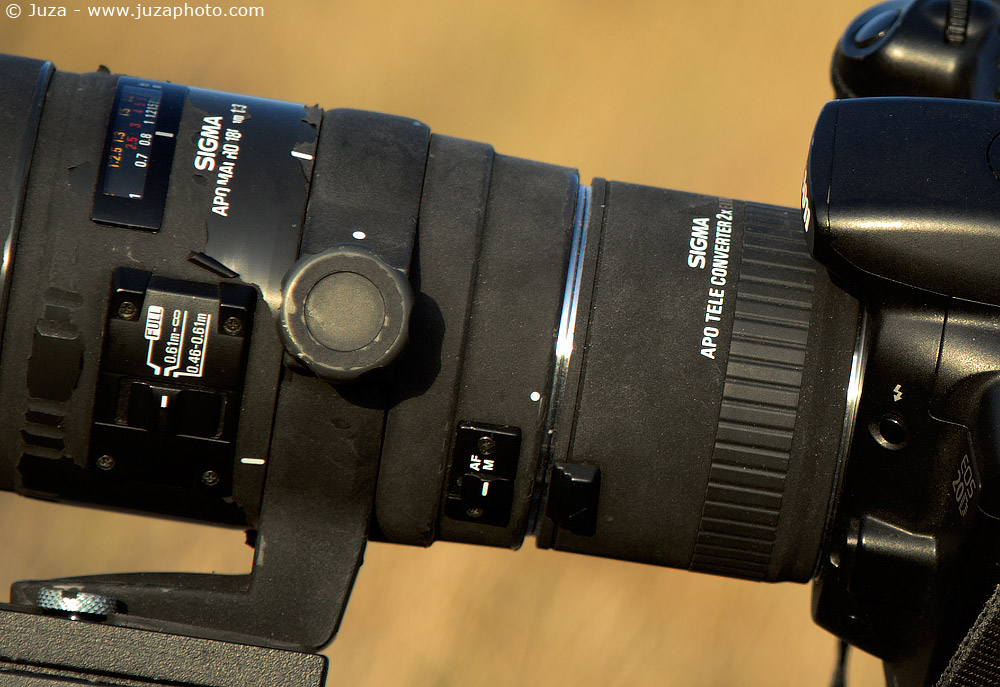
Sigma 180mm f/3.5 Macro EX with Sigma 2.0x teleconverter, mounted on the old Canon 20D.
In the past I have used a lot the TCs for macro work; nowadays, I rarely use teleconverters for my macro, but in some situations they can be useful. The teleconverters increase focal length, and they don't affect the minimum focusing distance: for example, if you put a 2x on the 180 Macro (that reaches 1:1 magnification and has a minimum focusing distance of 46cm), you get a 360mm macro with 2:1 macro capability at the same minimum distance of 46cm.
The higher magnification is not the only advantage of teleconverters (if you like extreme close-up, a dedicate lens as the
Canon MPE-E 1x-5x is a better choice, it gives better image quality and extreme magnifications that you can reach even with TCs). Two other advantages are
increased background blur and working distance. With a 360mm, it is easier to get a nice uniform background than with a 180; the narrower angle of view frames a smaller portion of background behind the subject. The working distance, even though it is not doubled as you might think, is greatly improved, so it is easier to approach the subject without scaring it.
What are the downsides of TCs? You lose autofocus (but it is not a problem for macro) and teleconverters always degrade image quality, but if you use them with an high-quality lens as the 180mm, the image quality is still very very good, if you stop down at least to f/8 (with 1.4x TC) or f/11 (with 2x TC). I have tried the Sigma 180 Macro with 2x TC for several months and I have been pretty happy with image quality, this combo is impressively sharp!
Unusual choices: tele lenses with extension tubes and wide-angles
There are various solutions to photograph small subjects. Some tele lenses have quite good reproduction ratios: both the Canon and the Nikon 300mm f/4 have a RR of 1:4 at the minimum focusing distance of 1.5 meters. You can reduce the minimum focusing distance, to increase the magnification, with extension tubes: they are simple empty tubes that you place between the lens and the camera. They don't have any optical element - their purpose is just to increase the lens-sensor distance: you lose the possibility to focus at infinity, but you can focus closer than normal. Ronnie Gaubert (
www.pbase.com/ronnie_14187), one of the best macro photographers of the worlds, uses a 300 f/4 with up to 68mm of extension tubes for its close up photos, and the results are simply amazing! The long lens gives an huge working distance and a great separation between subject and background.
The extension tubes are relatively cheap (Kenko offers a set of three tubes, 12, 20 and 36mm, at $170); while I prefer a true macro lens, the tubes are a good alternative if you don't want to buy a real macro or if you want to use telephoto and super-telephoto lenses for macro work. You can even add both extension tubes and TCs to the lens, to further increase magnification - a 300 f/4 is pretty sharp even with 1.4x TC.
A completely different approach is to use wide angles. While the majority of Canon and Nikon wide-angles have poor macro capabilities, Sigma offers some wide-angles 1:4 or 1:3 reproduction ratio, as the Sigma 15mm f/2.8 Fisheye, the Sigma 10mm f/2.8 Fisheye and the Sigma 24mm f/1.4 Macro. With these lenses, instead of separating the subject from the background, you portray the subject into its environment: it is an original approach, and it is more difficult than the classic "long lens macro", but in some situations it gives fantastic results. Fabio Pupin (
www.herpfolio.net) is one of the masters of this technique; visit his website to admire some truly great macro photos taken with the Sigma 15mm Fisheye.
Tripod and head for macro
A good tripod for macro photography must be stable and well built; you don't need a great maximum height - the majority of macro subject is pretty low on the ground - while it is essential a low minimum height: the lower, the better.
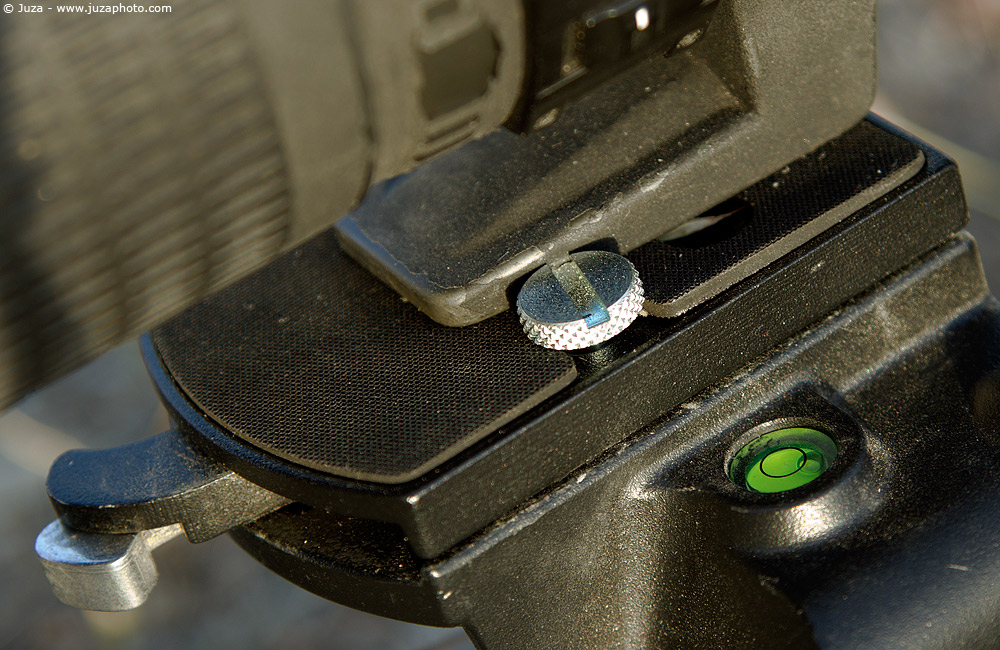
Another advantage of the Manfrotto 410 head is the large lens plate. If you mount the (included) 3/8" screw in reversed position, you can make it ever more solid, avoiding rotation of the lens foot.
After trying various tripod, I've bought the
Manfrotto 055XWNB for my macro work. It weights 2.3 kg, it is 61 cm long and it has a load capacity of 7 kg, moreover, it can get flat on the ground, that is very useful for macro photography. It has retractable rubber feet, that are ideal for use in the field, and it is not too expensive (it costs $ 190). I prefer the 055XWNB to similar Gitzo tripods - the Manfrotto has a better leg locking system, and it costs less than Gitzo tripods (that, in my opinion, are quite overpriced).
A cheaper option is the Manfrotto 190PROB ($120), that offers similar features, but it is a bit smaller and lighter (it weights 1.8 kg and it is 57 cm long). Sometimes I still use even the super small 190 MF4 as main tripod, but I recommend this model only if you really need to reduce at minimum the weight and size.
Which head? If macro photography is your passion, I'd recommend a gear head, as the excellent
Manfrotto 410. This head offers great precision, it allows to compose carefully the photo, even at the highest magnifications. It is quite slow to use, it is not an all-around head - I use it exclusively for macro, while I prefer a ball head or the Wimberley WH-200 for other kinds of nature photography.
For more information about support, I recommend to read the article
Tripods and heads.
Accessories
Even though I always try to reduce at minimum the accessories that I carry with me, there are some things that I consider very useful and I recommend.
The
Wimberley Plamp is an articulated arm that can be used for various purposes. As Wimberley says, "one end of the Plamp clamps to your tripod while the other grasps the object. Use the Plamp to stabilize windblown subjects, adjust the position or angle of your subject, or move obstructing foliage. You can also use the Plamp to hold reflectors and lens shades. One day in the field with a Plamp and you will begin to realize its full potential." I often use the Plamp to position and to stabilize my macro subjects, and sometimes it is really useful, and it allows to take photos that otherwise would be impossible due to wind or due to the position of the subject!
The only drawback of the plamp is that if you clamp it on the main tripod, as shown on the Wimberley website, and you use it to hold the subject, it transmits every small vibration to the subject, and it is difficult to make precise adjustments of the camera-subject distance. The solution is to clamp the Plamp to another tripod: whenever possible, I carry with me a super small 190 MF4 tripod (another option is the Manfrotto 715 SHB), that I use exclusively for the plamp. In this way, framing your subject is really easy, and you don't have any problem of vibrations created by the camera!
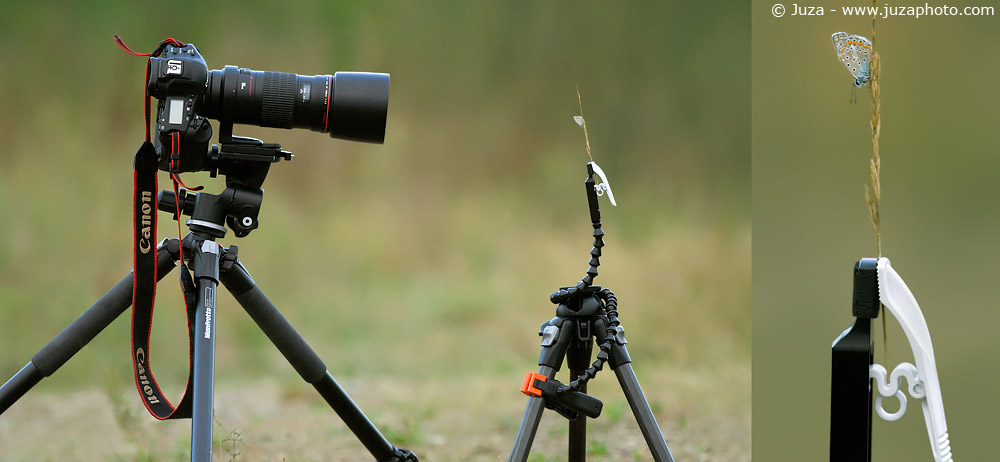
1DsIII with 180 Macro mounted on Manfrotto 055XWNB, while photographing a butterfly on a grass stem, placed in the perfect position thanks to the Plamp. The plamp is mounted on my small, but sturdy, 190 MF4 customized tripod.
Another accessory that I keep in my bag during macro trips is a small scissor to cut grass stems: sometimes I find butterflies and other bugs that sleep between the bushes or between high grass. In this case, instead of flattening all the grass behind the subject to get a clean background, I simply cut the grass stem where the bug is perched and I move it in a convenient location, where I can take the photo against a distant, clean background. Of course, this technique has some limitations: you can use it only in early morning, when the bugs don't fly away, and you can use it only if the subject is posed on a grass stem - don't even thing of cutting an orchid or a rare plant! (no, I don't feel guilty when I cut poor grass stems ;-) Do you feel guilty when you cut grass in your garden?)
I use the scissor, instead of breaking the stem with my hands, because it allows to cut the stem much more gently than breaking it, so there are less chances to scare away the bug.
I no longer use the angle finder and the remote release. In the past I used a lot the angle finder because it helped to frame the photo from weird angle and to focus carefully, but nowadays with live view it is not longer needed. Live view allows to frame comfortably the photo from every angle, and you can magnify the image by 10x or even more (while the angle finder had just a 2.5x magnification) for a very precise focusing. Considering that the angle finder was expensive, slow and cumbersome to use, I am really happy to have live view! :-) Other than that, in some cameras the live view replaces mirror lock up: since these features are essential for macro photography, I recommend to give a look to the article
Live View and Mirror Lock Up, that explains in detail how live view works and how to use it.
Remote release is still an useful accessory, but it has a big drawback: it is way too long, and when I walk around with my camera, it easily get caught in branches and bushes. After having lost my remote release, I decided to use the 2 seconds self timer, instead of buying another release.
Some accessories that
I don't use, but you may find interesting, are: reflectors and diffusers (they help to soften the light, but I take all my macro photos in early morning so I already have soft natural light), colored cards as backgrounds (I have tried in the past, but unless you create hundreds of "artificial backgrounds", all your photos will have identical backgrounds! I prefer to create a pleasing background using a long lens that blurs the background), spray bottles filled with water to create "artificial dew" (they are not necessary...you just need to go out in early morning and you will often find bugs covered by dew; and if you don't find dew...no problem! It is not necessary to have always a subject covered by dew!).
Flash and macro
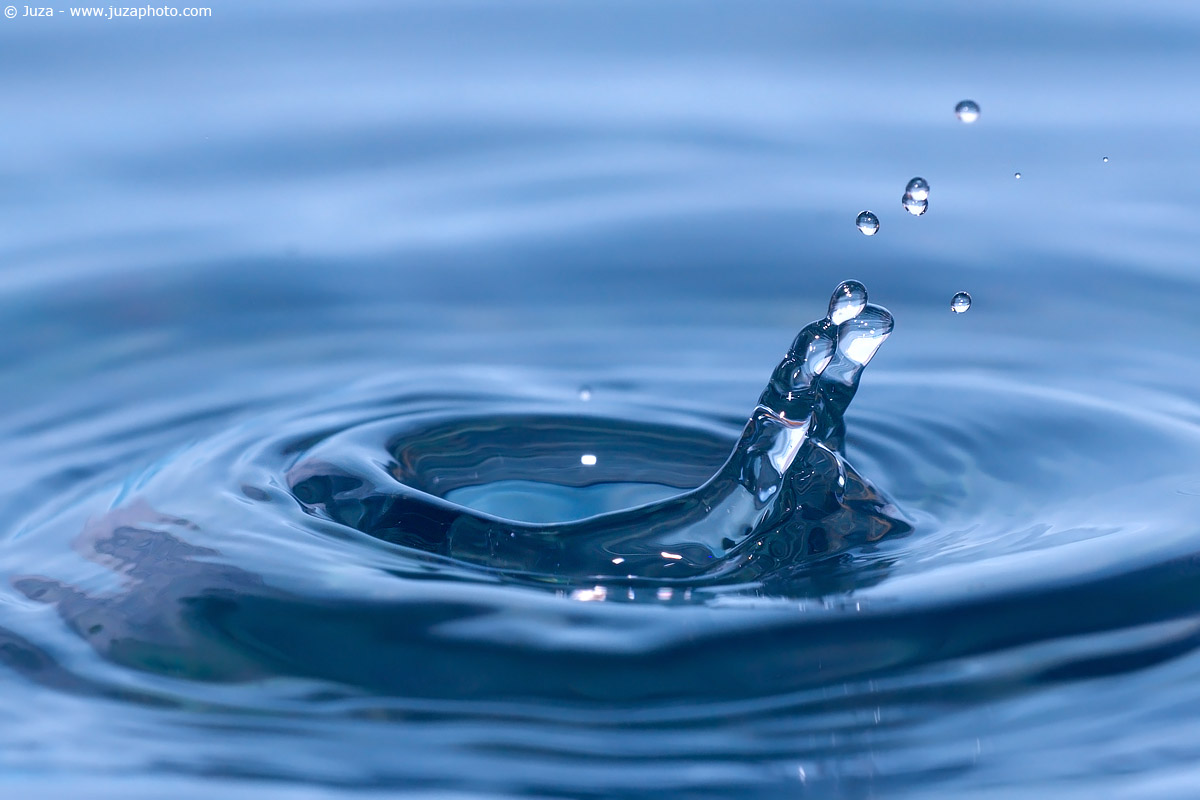
Water Drops - Canon EOS 20D, Sigma 180mm f/3.5 EX APO Macro HSM, 1/200 f/11, iso 400, tripod, Canon 580 EX flash.
Sometimes, shooting in natural light is not possible, or it does not give the desired results. If you are photographing a very active subject and you have not time to set up the tripod, and you need some system to freeze both your movements and the subject movement. The solution is the flash.
The light of the flash is very, very fast; it may last from 1/2,000 to 1/50,000, and it allows freeze the motion, but you have to use it as main light. In other words, you have to exclude completely the ambient light, otherwise you get a "ghost" effect: the photo becomes a kind of double exposure, with a sharp image of the subject (created by the flash) and a blurred one (created by ambient light). To use the flash as
main light, set the camera in M mode, set the ISO on the lowest value and stop down the aperture to f/11 or f/16. To reduce the amount of natural light that hits the sensor, choose the fastest shutter speed that you can use with the flash at full power (the x-sync speed, that usually is 1/200 or 1/250).
To get an uniform illumination, it is necessary to use an off-shoe flash, and the Canon 580 EX II or the Nikon SB900: the in-camera flash usually gives harsh light and deep shadows. Ideally, you should place two flash, one on each side of the camera: one flash acts as main light, the second one brighten up the shadows created by the main flash. If this setup is not possible, you can get good results even with only one flash: place it at an angle of nearly 30-45 degrees with the subject.
A common problem of flash photography is the black background. Since the flash is set to expose properly the subject, the background becomes underexposed, and if the background is very distant it might be so underexposed that it becomes completely black. Someone like this effect; personally, I don't like it - with few exceptions - because in my opinion it gives a "nocturne" and artificial look to the images. There are mainly three ways to avoid black background. You can try to frame the subject against a close background, the reduce the underexposure; you can frame it against a naturally bright background (as a grass field in direct sunlight); you can direct a second or third flash on the background to even the exposure.
Depth of field, aperture and shutter speed
The depth of field is one of the main issues in macro photography. You need small apertures to have enough depth, but if the aperture is too small you get bad photos due to slow shutter speed, busy background and diffraction.
Usually, I take my macro photos using apertures
between f/8 and f/16; I use f/22 only when I really need the maximum DOF. It is better to avoid apertures smaller than f/16, because they led to a big loss of sharpness and contrast, due to diffraction. The higher the magnification, to more you see the effect of diffraction: at 1:1 or 2:1 there is already a strong diffraction even at f/16 (but the photos are still useable), while at 3:1 you have to use f/8 or max f/11 to get a decent sharpness. At 5:1, the sharpness is ok at 5.6, and the photos are barely usable at f/8. Remember that all lenses suffers of diffraction at small apertures, and it can not be avoided, since the diffraction is a physical phenomenon and not a defect of the lens.
As you have understood, you have to fight with two contrasting needs: you may want to use wide apertures to avoid diffraction and to get fast shutter speed and clean background, but you also need to use small apertures to get a good depth of field. There are various "workarounds" to get the desired results. Whenever possible, try to photograph the subject from a low angle, to frame it against a distant background: a close background tends to be distracting, while a distant background is more uniform and it does not steal the attention from the subject. Other than that, using a long lens helps to get a clean background even at f/11 or f/16: the same photo has a more uniform background if it is taken with a 180mm instead of a 50mm. Remember that the depth of field is the same for every lens - at f/16, you have the same DOF both with a 50mm or a 180mm - but the 180mm has a narrower angle of view, so it frames a smaller portion of background behind the subject, and you get a more uniform BG.
To optimize the depth of field, usually I try to have to place the camera as
much parallel to the subject as possible. When I have taken the exposure, I check the sharpness and the focus on the LCD of the camera, using the magnification tool - while it does not give a very accurate preview, it is enough to understand if the photo is in focus and it is not blurred by the wind or by subject movements.
Sometimes, placing the camera perfectly parallel to the subject is not possible, or it is not enough to get the entire subject in focus, even at f/16. There are two possibilities. The easiest choice is to use selective DOF: instead of stopping down to try getting the entire subject in focus, you choose the most important portion (usually the eyes for bugs), and you shoot with a relatively wide aperture to blur everything, except the area that you have selected. If, instead, you are determined to get everything in focus, you can use the technique of merged photos for extended DOF, described in this article:
Merged photos for extended depth of field.
Of course, the aperture does not influence just DOF - it determines also the shutter speed. Whenever possible, I try to use ISO 50 or ISO 100, because it gives the best image quality. At such low sensitivity, usually the shutter speeds range between 1" and 1/20 with apertures as f/11 and f/16, since I photograph in dim light, in the first hours of the morning. To avoid motion blur, the camera is mounted on the tripod, and I use both mirror lock up and self timer; the movement of the subject are not a problem, because in early morning the bugs stay quite still. The wind, instead, is a serious problem: even a slight breeze is enough to move the subject and to blur the photo. To get the best result, I photograph in the short pauses between the wind breaths, and I take many identical exposures of the same scene to increase the probabilities to get al least one sharp photo.
If the wind doesn't allow to get sharp photos at the chosen shutter speed, I raise the ISO by one or two stops. If the shutter speed is still too slow even at ISO 400 or ISO 800, I open the aperture to increase the amount of light that reaches the sensor. The DOF becomes shallow, and it is essential to selectively focus on the most important elements of the subject.
The flash, when it is used as main light, allows to freeze the movements, but personally I prefer to use exclusively natural light: usually, it gives a softer contrast and better colors than flash. If you master the flash you can get very good results, but it is difficult to equal the beauty of soft, warm sunrise light.
The first hours of the morning and the light
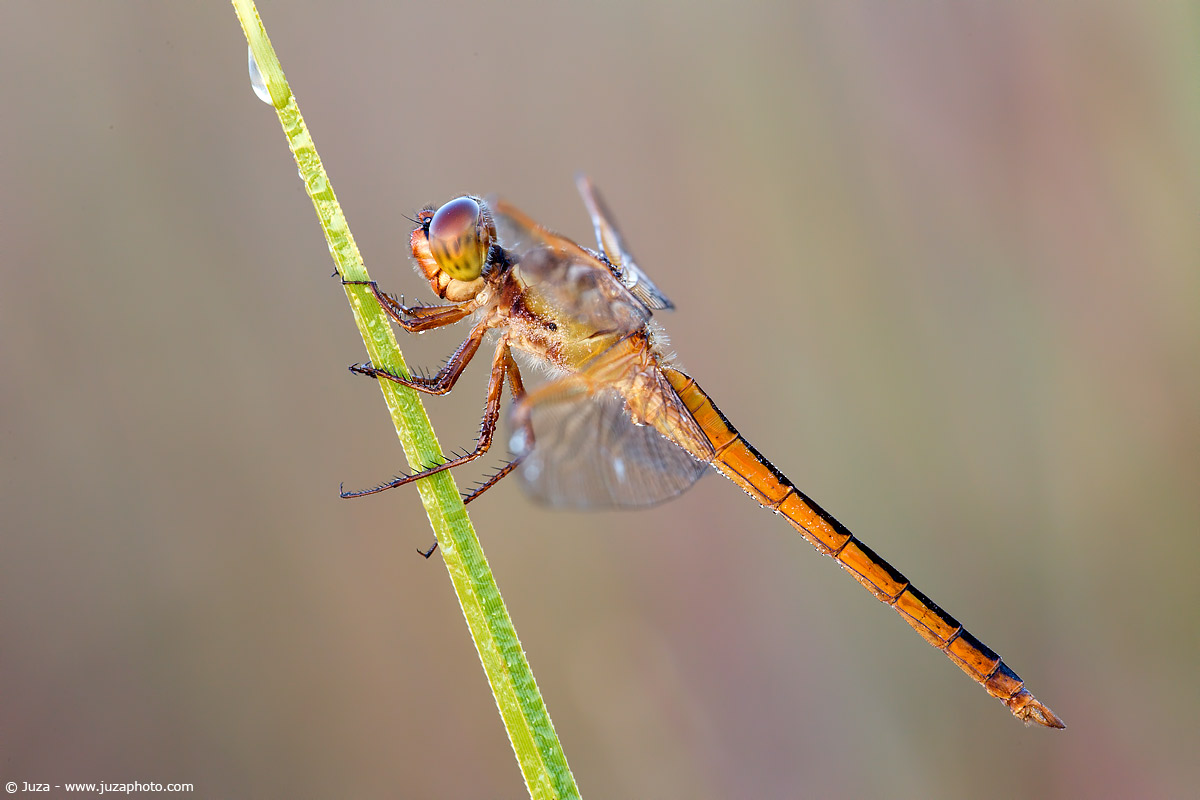
Dragonfly - Canon EOS 1Ds Mark III, Canon EF 180mm f/3.5 L USM, 1/20 f/11, iso 800, tripod. Florida, USA.
The first hours of the morning are the "magic moment" for macro photography. Butterflies and other insects are covered by dew and they stay still, waiting for the first rays of sun to dry their wings. It is quite easy to get close without scaring your subject, and you have a lot of time to compose carefully the photo and to repeat the exposure if you are not satisfied by the results. I take the majority of my macro photos from 30 minutes before sunrise to 1-2 hours after sunrise.
Other than that, the light at sunrise is warm and soft; it creates very pleasing colors and light shadows. During the day, instead, the light becomes progressively harsher, and at midday there are strong dark shadows and excessive contrast. If I find an interesting subject harsh light, I try to shade it with my own shadow, but it works only if the subject is a flower or a tame bug (don't try to shade a butterfly - it will fly away). Moreover, you have to put in shade both the subject and the background: if you photograph a subject in shade against a bright background, you get very poor results.
Many amateur photographers think that sunny days are ideal for photos, but actually cloudy days are much better for macro and flora photography: the clouds acts as an immense diffuser, and you get a soft light, without excessive contrast and deep shadows.
The soft light gives less contrast and very pleasing colors - sometimes you may have a blue cast, but it can be easily removed with Photoshop, and after a little of post processing you get a great photo, with intense, rich colors, that you wouldn't have got in direct sunlight.
Another way to get great photos is to photograph the subject in backlight. The backlight "outlines" the borders of the subject; water drops and dew shine when photographed in backlight. On the other hand, you have to be careful with the exposure, otherwise the subject may be overexposed or underexposed. Always check the histogram and the highlight screen; sometimes, a slight fill flash may help to brighten up a little the subject.
The composition
The composition of a macro photo depends by the subject; usually you have to follow the same "rules" that applies also for fauna photography: avoid centered or tight compositions, leave some room in front of the subject, place the focal points in the thirds of the frame. Other than that, you can use diagonal lines and graphic elements to create stronger compositions.
A centered subject gives a static composition. Usually, it is better to leave more room in front of the subject than behind.
You must never clip the tips of wings, tails, flowers: the composition should not be excessively tight.
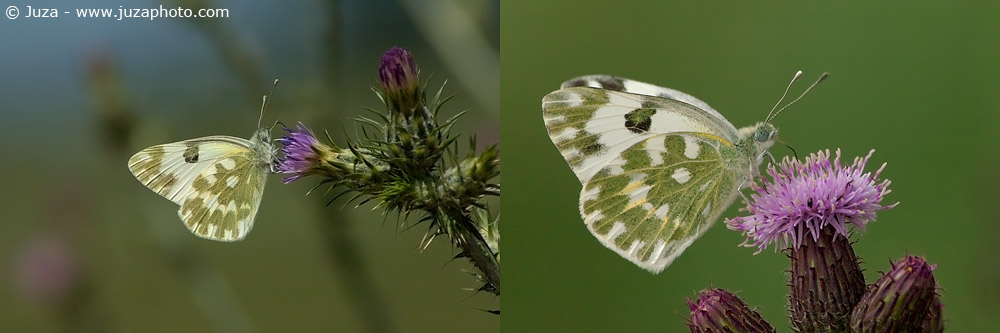
The examples above shows the same subject with different composition. The first example show the difference between a centered photo and closer, well balanced composition. The second has much less empty room (without being tight); there is more room in front of the subject than behind it.
The second examples shows another common error of beginners: sometimes with a macro lens and a collaborative subject you are temped to take a very tight photo, but as result the subject looks "trapped" and the tips are clipped. In the second, better, photo, I placed the subject diagonally, leaving more room all around. If you want to get really close, I'd suggest to make a portrait: if the crop is clearly "deliberate", it often results in a pleasing composition.
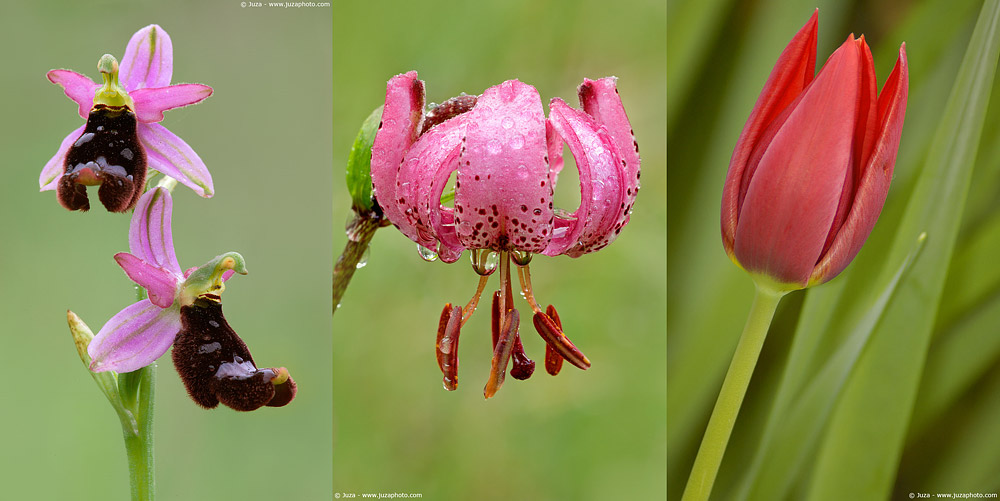
From left to right: asymmetric composition, symmetric composition, diagonal composition.
Of course, there are many other ways to compose successfully a photo. If the subject has a symmetric shape (as many flowers), a centered composition works well; while for asymmetric subjects you can follow the rule of thirds. The first image is an example of asymmetric composition: there is more room "behind" the flower (in this case, on the right side) than "in front" of it (left side). This is by far the most common composition for flowers and plants. In the second photo, instead, the flower has a very symmetric shape and the axis of symmetry is placed in the center of the frame.
The diagonal composition is another way to get a pleasing, balanced photo. The diagonal lines are a powerful compositional element; you can use evident (for example a diagonal stem) or implied (as a series of objects placed diagonally) lines to achieve various effects. The diagonals can draw the attention on a particular element that you want to highlight; they can create a "compositional flow"; they can intersect with horizontal and vertical lines to create contrasts and graphical elements.
It is difficult to get the perfect composition at your first try. Often, I take many photos of the subject from different angles, and when I am at home I watch them on my computer and I choose the best one. Other than that, it takes some time, and a lot of practice, to develop a good eye for composition! A good way to improve is to watch the photos of skilled and inspirational photographers; other than the already mentioned Ronnie Gaubert and Fabio Pupin, I highly recommend to visit the website of my friend Daniela Pipitone (
www.fotografainerba.com)- she has a great eye, and many times when we go take photos of the same subject I am amazed by the compositions she finds. You never cease to learn! :-)
The background
The background is an essential element of the photos - it may really make the difference between a good photo and an awesome photos. Usually, a good background must not distract the attention from the subject: for this reason, I always try to get uniform, out of focus background. A "busy" background instead distracts the viewer and detracts from the subject.
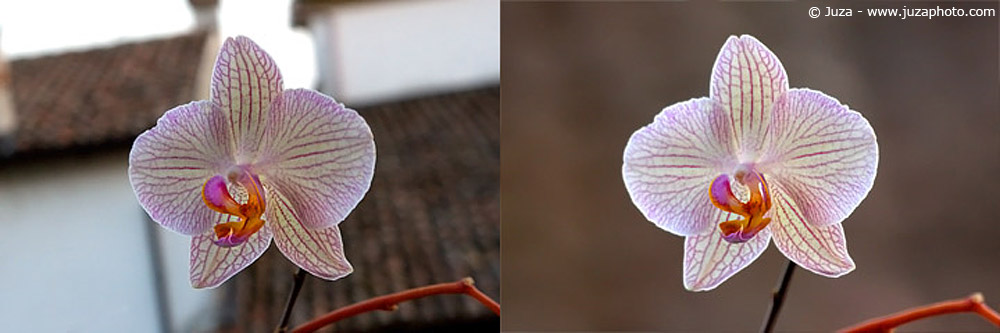
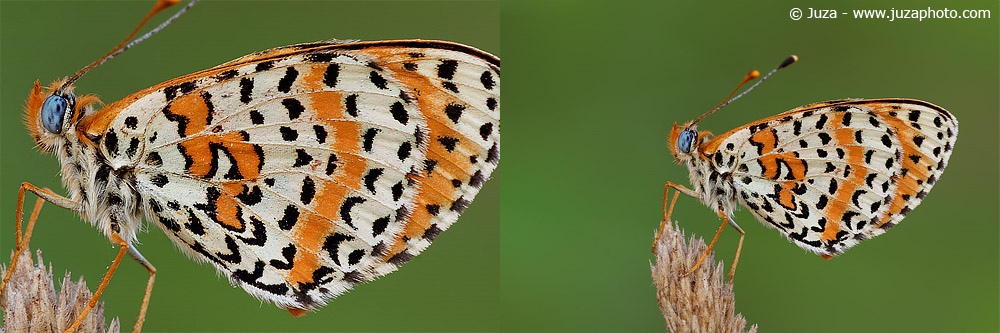
A comparison between the same subject photographed with a distracting background (left) and a pleasing background (right).
The two photos above show the difference between a photo with a busy BG and a photo with a clean BG: the subject is the same, but the second photo is more pleasing. There are mainly three things that determine the look of background: the focal length, the aperture and the distance from subject. Both the photos had been taken at f/11, but one has been taken with a 50mm, while the other is taken at 300mm: the long lenses allow to be very selective on background thanks to the narrow angle of view. In other words, if you take two photos with the same aperture, the one taken with the longer focal has the cleaner background.
Using a relatively wide aperture also helps to avoid busy backgrounds. That said, small subject like flowers or bugs require more depth of field than large subjects, so you can't shoot wide open, you need al least f/5.6 or f/8. The distance subject-background is the third variable. A distant background is more out of focus than a closer background: when possible, I recommend to use a low angle of view to frame the subject against a distant background.


 JuzaPhoto contains affiliate links from Amazon and Ebay and JuzaPhoto earn a commission in case of purchase through affiliate links.